Saturday 23 March 2013

Day 6: Fava Fever, March 23, 2013

                                                                                                                                                 
Fava, in Greek cuisine, is a very versatile ingredient.  For someone not familiar with the term "fava" in Greek, it does not refer to the common broad bean known as the fava bean. To many people of Greek ancestrtry, the fava bean (Vicia faba) is, in fact, poisonous. The dish we are preparing today, fortunately, is a very safe dish and a very tasty one at that! When Greeks refer to "fava" as food, they are referring to yellow split peas; the common greek term for the actual fava bean is "koukia" (κουκιά).

Many cultures use split peas as a staple food in their diets.  For example, here in Canada, various regions have their version of yellow split pea soup, which we know as a typical part of many family dinners (in Quebec it is very popular, particularly with cubed smoked ham or bacon).  In the past, British people boiled yellow split peas  to make a thick soup or stew, often referred to as porridge, but it carried a stigma of being just for the poor people to eat.  That is no longer true, we believe.  Many people (all over the world) have found that beans and legumes enhance their diet in a healthy, nutrient rich, and inexpensive way.

Raw, uncooked fava (yellow split peas)
For many Greeks, fava is a favourite food as it has a high protein content and very low fat content.  As we spoke to people from different parts of Greece, each one told us different ways that they would eat fava -- as a dip, a spread for a sandwich, with vegetables and sometimes more like a sauce.  There were just so many options.  We chose the most traditional and typical fava, which is as a dip.  Making this was interesting to learn, and because of the success of this dish, we will make it again several times this Great Lent.

Yellow split peas are rather inexpensive and can be used to feed many people.  It is always nice to find a cheap way to feed so many!  In fact, we recently paid $1.29 (Canadian) for 750 grams (26 oz).

Well, we went looking for the right recipe -- one that was traditional and appropriate for Great Lent.  We found this recipe in our cookbook Food From Many Greek Kitchens by Tessa Kiros.  She has an interesting story of her own about why she assembled this book and about her own family background (her parents are Greek Cypriot (father) and Finish (mother).  Some of the recipes sounded like what my Yiayia made, and others sounded a little less familiar.  This well written  and beautifully illustrated cookbook is separated into chapters with titles that we liked (e.g. Traditional Foods, Fasting Foods, Easter Foods, Ladera and Salads...).

In the "Fasting Foods" chapter, we found the explanation on how to make fava.  And, it seemed  like it would be mild, but tasty.  So, for this recipe to make 4 cups, you will need:

18 oz fava (about 500 g)
1 small onion, peeled
2 cloves garlic, peeled
1 to 1 1/2 teaspoons salt

To garnish, use olive oil, sliced red onions,  and/or capers

Since the olive oil is just a garnish, omitting it can be ideal for a very strict fast!  Today, we completely omitted oil from this recipe.  Here is how we made Fava:

First, rinse the fava.  Rinse well because there is a film on the peas that will turn the water very murky.

Rinse the fava very well.
If you don't rinse the fava well enough, you will see this murky, cloudy water.  If so, rinse again until the water is clear.
Now the water is clear.
Cover the fava completely with water.  There should be about 1/2 inch of water above the level of the peas.  Then, put the pot on the stove and bring to a boil.  You will see a foam forming on the surface of the water as the fava starts to boil.  If you allow it to boil a little more than 5 minutes, you will see the foam increase.  After about 5 minutes of boiling the amount of foam doesn't change, so you can move onto the next step.

The foam from the boiling fava.
After boiling for a few minutes, rinse the fava very well to make sure to get rid of all the foam and residue.  Continue to rinse the fava until the water is completely clear.


Return the fava to the pot.  Drop in the onion and the garlic.  Leave the onion and garlic whole, because if it is cut, it will fall apart and you will have difficulty retrieving it in a later step.  (We had only large onions, so ours was cut in half.  But, it was difficult to pull out the individual layers of onion.)

Now, add 4 cups of HOT water and bring the mix back to a boil.  Partially cover the pot and let it boil for about 30 minutes.  Then, take the lid off the pot, turn down the heat and simmer the peas until most of the water is absorbed.  You will see that the split peas start turning break down and fall apart, and that is what you want!


Then, using a fork or spoon, pull out the onion and the garlic.  You will likely have some of the peas stuck to the garlic, but that's okay; it's not that much to lose.  If you try to pull the peas off of the cooked garlic or the onion, you will likely smash the garlic or the onion will end up with that puree in your peas.  This can be too strong of a flavour, so try to avoid that.


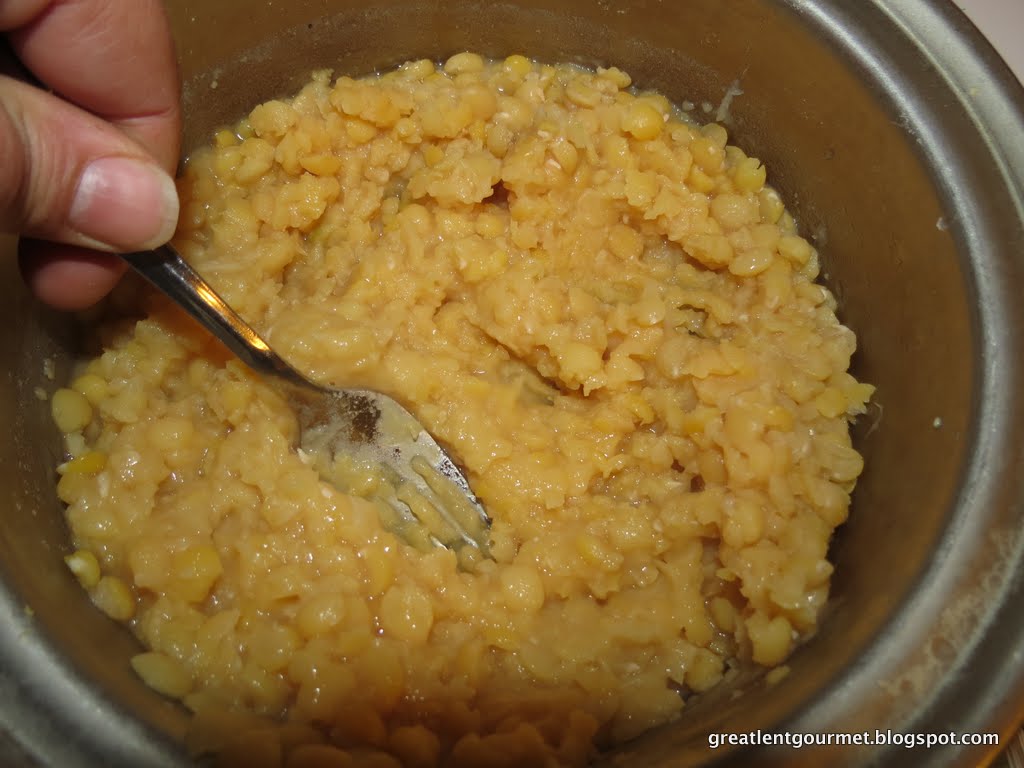
Now, smash the fava to the consistency that you prefer.  You can use a hand blender, but a fork was easy since the peas were so soft and creamy already.  You can make it as creamy or as chunky as you prefer, and with a fork, you have more control over the texture.


Lastly, add a pinch or two  of salt.  The amount you will add will be based on your personal preference.  We found that the a bit of salt was necessary, otherwise the final product was too bland.


Mix the salt in well, and continue to smash the peas to the ultimate texture.  We chose to make ours more chunky than smooth.  Let the fava cool a bit before putting it in the serving dish.  You can serve this warm or cold.


And, garnish it as you like.  We chose to use large capers.  The salty caper was a nice complement to the mildly flavoured fava.

Once we served the fava to our guests at dinner, we found that a little squeeze of a lemon produced a beautiful flavour.  It's something that we jokingly say in our household about  fixing many flavour issues in Greek cuisine -- just add lemon!  One taster said that she noticed the garlic in this dish and that it was, "... better than any hummus I have eaten."  This dish could easily be a substitute for hummus.  It even has the same colour as hummus.  Another taster has made this in a creamier version and used it like a sandwich spread with lettuce and tomato, but also enjoyed that we left ours more roughly mashed.  And, one other taster claimed, "It is not a strong flavour, but mildly smooth and very pleasant." That said it all for us -- smooth and pleasant!

We hope that you enjoy the fava as much as we did.  This is one recipe from this book that we will continue to make.  If you have other ways to make Greek fava, we would love to hear your methods or ideas. Until then, καλή όρεξη!


Let us be satisfied simply with what sustains our present life, not with what pampers it.  Let us pray to God for this as we have been taught, so that we may keep our souls unenslaved and absolutely free from domination by any of the visible things loved for the sake of the body.  Let us show that we eat for the sake of living, and not be guilty of living for the sake of eating.  The first is a sign of intelligence, the second proof of its absence.

- St. Maximus the Confessor


Friday 22 March 2013

Day 5: Organic Bean Salad, March 22, 2013


Bean salad is something that in our family we make often, especially in the summer to enjoy at picnics and gatherings.  There are so many types of beans and vegetables that we can mix together to make a different salad each time.  This time, we chose to follow the recipe on the package.  We bought a bag of mixed beans by a company called truRoots.  The variety and combination of beans in this package are ones that we thought would taste nice for soup, for salad, or even for some stews and pastas.  In this mix are lentils, adzuki, and mung beans.  Lentils are a staple food for us, and for many Mediterranean cultures.  Many Greek families will sit down with a pot of Fakes (lentil soup) at the beginning of each winter.  Although, we know that fakes are eaten all year round.  Lentils, themselves, offer so many choices of what to make.  But, this mix had the other two beans included, so we had to decide what to do with it.  We did not know about eating adzuki beans by themselves as beans.  We have heard of them being one of the superfoods of today.  They are said to be good for digestion, as well as ta great source of fibre and protein.  We also learned that the adzuki bean is boiled with sugar to make red bean paste that we love to eat in Asian foods (e.g. sesame balls).   Mung beans are the other beans in this mix  These we are more familiar with in the form of bean sprouts.  Other sprouts are from soybeans, but often the mung bean sprouts are nicer looking (drier) at the grocery store.  They are also often used in a variety of Asian foods.   Greeks use beans regularly as part of our diet, and maybe even more during Great Lent, as a way of assuring we have an adequate amount of fibre and protein, a bean mix seemed like a natural choice for us.  And, bean salad is a simple side dish that goes with almost everything!


We followed the recipe on the package.  We figured that the Organic bean mix that was Gluten Free would have an interesting approach to salad.  We have been reading about how many foods and seasonings have gluten, it is surprising to us.  So, we wanted to make sure to keep this gluten free and organic.  We went shopping specifically for organic vegetables, and read the label on the cumin to see if it mentioned any other additive or ingredients.  It did not.  So, how do we make the salad from this?

For this recipe, you will need the following ingredients:


truRoots Sprouted Bean Trio
1/4 teaspoon ground Cumin
1 small to medium cucumber
4-5 scallions (green onions)
2/3 cup chopped parsley
1/2 bell pepper (green, red, or yellow)
Lemon Juice, to taste.


Start with one cup of bean mix and three cups of water to boil the beans.  Cook them until they are soft and cooked through the centre.


While the beans are cooking, you should get your other ingredients ready.  You want to make small enough pieces of the vegetables to go with the size of the beans.  We cut a fine dice on the peppers and the scallions. The cucumber was peeled, then diced.  But, with the parsley, we decided to leave the florets whole, because it looked pretty.  We plucked the floret right at its base, so not to include any stems.

Once the beans are cooked, drain the water and let them cool.  They should be at room temperature when adding the other ingredients.  So, in a bowl, put the cooled, cooked beans and add the peppers, cucumbers, scallions, and parsley to the beans.


Once all the veggies are added to the beans, add the cumin and the lemon juice.  We chose to squeeze our own lemon juice to keep this organic.  You could use bottled lemon juice if it is organic, or if you are not as concerned with that.  Many lemon juices are gluten free if they are only lemon, but read the label to make sure!

Mix this together well and adjust the seasonings as you need.  And, just to remind you, cumin does get a little stronger as it sits and blends in with all the other flavourings.


Serve the bean salad either at room temperature or chilled, and enjoy!

We shared this with several people to see what they had to say about our organic, gluten free bean salad.  Most of the people who tasted it said it was very light and fresh tasting.  Two people could immediately taste the cumin,and said it was a little strong in its flavour.  One person said that bean salad really is good by the vegetables in the salad, and told us, "The better the vegetables, the better the beans."  We agree with that!

For us, this was a nice salad.  We loved the combination of lemon and cumin, and are very familiar with it since the pair is used in many Greek (Cretan) foods.  We liked the bean combination, but none of bean varieties stood out.  We often used canned beans, add a little frozen corn or peas, use some sun-dried tomatoes, and make bean salads as colourful as we can.  But, this was easy enough, and did look nice with the addition of the vegetables.  The next time, though, we may choose a red pepper instead of yellow, just to add a little "pop" of colour.  It was light, delightful, and, thankfully, there was no oil, so it is a perfect fasting food for Great Lent, as well as for any strict fasting period.


'Fasting appears gloomy until one steps into its arena. But begin and you will see what light it brings after darkness, what freedom from bonds, what release after a burdensome life.'


+ St Theophan the Recluse

Thursday 21 March 2013

Day 4: Tasty Taramas made with Potatoes. March 21, 2013


Taramas is a staple food during Great Lent.  It is one of those curious lenten dishes because it is made from fish roe, but we are not allowed to have fish.  The roe, however, is not counted in the category of meat or fish.  Therefore, we can make taramosalata and eat it.  In the past, we have made this with bread -- cutting off the crust of stale white bread and then soaking it in water to add to the whipped roe.  But  this time, we made tarama with potatoes.  This, for us, was a first.  We had heard of other people doing this, but potatoes were for skordalia, not taramosalata.

So, we tried a  new recipe for this.  We found an easy recipe online, but omitted the olive oil and used vegetable oil instead.  The folks at Yumly really made it easy for us.  We had all the ingredients, and could not let Great Lent begin without having taramosalata on the table.  For this recipe, you will need the following:


2 large potatoes
5 ounces tarama (cod roe)
1 small onion, chopped
1 1/2 lemons, juiced
3/4 cup oil
garnish with lemon, parsley, or capers


Peel the potatoes and cut into small chunks.  Put them in a pot of water and boil them until they are fully cooked.  They should be cooked long enough as if you were making potato salad.  Drain the water when they are done cooking, and keep the potatoes aside for a future step.  In the meantime, while the potatoes cook, chop the onion and puree the tarama with lemon juice.


The recipe called for 5 ounces of tarama (142 g), but we thought that was too much, and we cut it to 3 ounces (85 g).    This was approximtely half the jar of tarama.


Whip the tarama until it is light and fluffy.  This will take about ten minutes (yes, 10 minutes).  The tarama will have the consistency of mayonnaise.


You need the juice of one and a half lemons.  Juice the lemons with your favourite juicer to remove pulp and seeds.  Then, add the lemon juice to the whipped tarama.  The lemon juice may make the tarama a lighter shade.


You will need one small onion.  We had very large onions, so we cut ours in four, and used one fourth of the whole onion.  Cut it into small pieces that will fit into the food processor or blender you are using. 


Add the onions to the food processor and whip until it is completely smooth.  Then, let this rest and work the potatoes.


In a separate bowl, mash the cooked potatoes.  You can use a fork, potato masher, or a hand blender.  Remember, the more you mash, the smoother your taramosalata will be.


We chose to mash our potatoes enough to have some texture, some chunks still intact.  You can see the chunks of potato in the bowl.


Fold together the whipped tarama mixture with the potatoes.  Fold until the colour is uniform and everything is fully mixed.  


Taramosalata is ready to serve.  We garnished with a slice of Meyer Lemon, but you could use capers, chopped red onions, parsley, or whatever you like.  Keep this chilled until serving.

When we made this recipe, we were skeptical with the amounts and the statement that this would serve 7 people.  Of course, we do not believe that this serves 7 Greek people!  Regardless, it was delicious.  One of the people who tasted this said, "I don't usually like tarama because it's too fishy.  This one has a nice, mild fish taste."   Another taster said, "This is different because it's chunky.  It's like fish mashed potatoes."  We are not sure if that is good for others or not, but the taster was honest.  Our last comment from a taster was that this was "... creamy and good.  I don't need the bread, I just need a spoon!"  We think that was the best compliment we could have received... that and, there were no leftovers!  

We would use this recipe again because it was so easy to follow, and easy to make.  The directions were clear, and simplified.  Mostly, we would make this recipe again because we all enjoyed eating it!  After all the years we have made taramosalata with bread, we find that the potatoes were a cleaner way to make this.  No more dipping our hands in the water and squeezing the bread.  Potatoes are always on hand, whereas sliced white bread is not, so that makes this a more convenient recipe for us.  If you recall, we made taramosalata  in Great Lent Gourmet 2012 (Day 12) but then we were focusing on the differences of making it with the two brands of roe that are readily available in the store.  This time, we wanted to focus on the recipe itself, regardless of which brand of roe one is using.  So, we can confirm that taramosalata made with potatoes is delicious and easy.  For us, it will be a staple food during Great Lents to come.


Above all, strive to love your neighbor; for in his love consists love for God.
- St. Macarius of Optina