
Today is the day that we prepare for the Resurrection. It is a busy day of attending church, preparing soup and food, and remembering to thank God for all the wonderful gifts, joys, and challenges that we are able to face each day. Up until now, we have tried to focus more on prayer, family, and Lenten foods. We have one more treat to share for this season, and it is something that many may not consider to be a treat -- kokoretsi. What is kokoretsi that turns off some and excites others?
Kokoretsi is a traditional Greek style, homemade sausage-like delicacy (to many, but not to all!). It is hand made, hand tied, and roasted along side the lamb (in many cases). It can be an appetizer, a meal, or a snack. For us and many others it is a filling food, packed with flavour, iron and protein. So, what exactly is Kokoretsi?
We have previously shared with you our family recipe for making Mageritsa (Sunday, April 15, 2012), where we use the liver, heart, kidney, and lungs to make a very traditional soup. Now, we are taking that same offal to make a special sausage-like delicacy called kokoretsi . But, there are a few particulars about this sausage-like treat that makes it completely unique and different from any sausage you buy in a store. We took the heart, lungs, kidneys, and liver of our lamb and cut it into pieces, wrap it in a sheet of fat (caul fat) and tie it together with intestines to make this dish. If you are not able to get these body parts from the butcher, then, come to Canada, and we will help you get some offal from our favourite butchers at Sun Valley Supermarket in Scarborough (part of Toronto).
For this recipe, you will need the following:
1 package of lamb Sikotaries (lamb liver, kidneys, lungs, and heart)
1 pound caul fat
1 pound entera (lamb intestines)
salt, pepper, oregano

First, we would like to point out that we really do use the entire animal. We try not to be wasteful, so we cook the outside of the lamb for the meat, but, now, we know what exactly we should do with the inside of the lamb. Please allow 2 hours for this recipe, plus cooking time.
The first thing we did was wash the intestines. A lot of icky things pass through the intestines in a lamb's life. We need to rid the parts from all the impurities. Initially, you may look at the intestines and think they are to thin and too narrow for anything be in there, but it can! We used running water through the one end of the intestines and allowing the water pressure to push out the impurities. We added water to the entera and the intestine tube expanded. It was like filling a long water balloon, and we had to make sure the water washed through the entire length of the entera. Allow the water to fill the intestines, and push it along, squeezing the intestines to squeeze out any materials still inside. Continue to do this until the water running through the intestines come out completely clean. We washed the enter five times to make sure they were totally clean. This will take time. This task, done with one somewhat inexperienced person took two hours to clean 1 pound of intestines. Continue to rinse until the water runs clean. It is so important to have these clean, we just had to repeat ourselves.


Set aside the intestines, and now, and let's get the rest of the ingredients ready. Since there are so few ingredients, we will start by getting the body parts cut. We separated the parts from one another and cut each one to get relatively equal size pieces. Using a scissors was easy for cutting, and we think that it was easier than a knife is for this meat. The offal are small, soft and slippery, and may be difficult to handle.
After cutting all the pieces, we wanted to make sure to rinse the meat pieces. We rinsed after cutting because there may be something on the knife or scissors as we cut through the meat, but washing after cutting will help wash away any residue that was there. Put the pieces in a colander to wash or to rinse. Run cold water over the pieces, turning them around and around, and continue to rinse until the water runs clear. This should take only about 2 minutes.


Now, lay out the caul fat. This is the stomach lining of the lamb, and it has a lot of flavour. Buying it from the butcher should be rather easy, especially if you are buying the sikotaries, too.
Be careful when you open the sheets of fat -- they tear easily. You will know it is fresh when you look at the pattern that is on each sheet. The pattern should be clear and easy to distinguish. If the caul fat is all bunched up and does not show the beautiful pattern, it may be a little old.
Lay out the sheet of caul fat so it is longer than the skewer. It is okay if it is not as wide as the skewer, since you can layer two pieces together. We laid our sheet of fat on a piece of parchment paper.


Now, it is time to start skewering the meat. It has been sitting aside for about 10 minutes, while we go the fat ready to use. That ten minutes was enough time for the meat to marinate a little, and you will see that the salt pulled out some of the liquid from the offal.
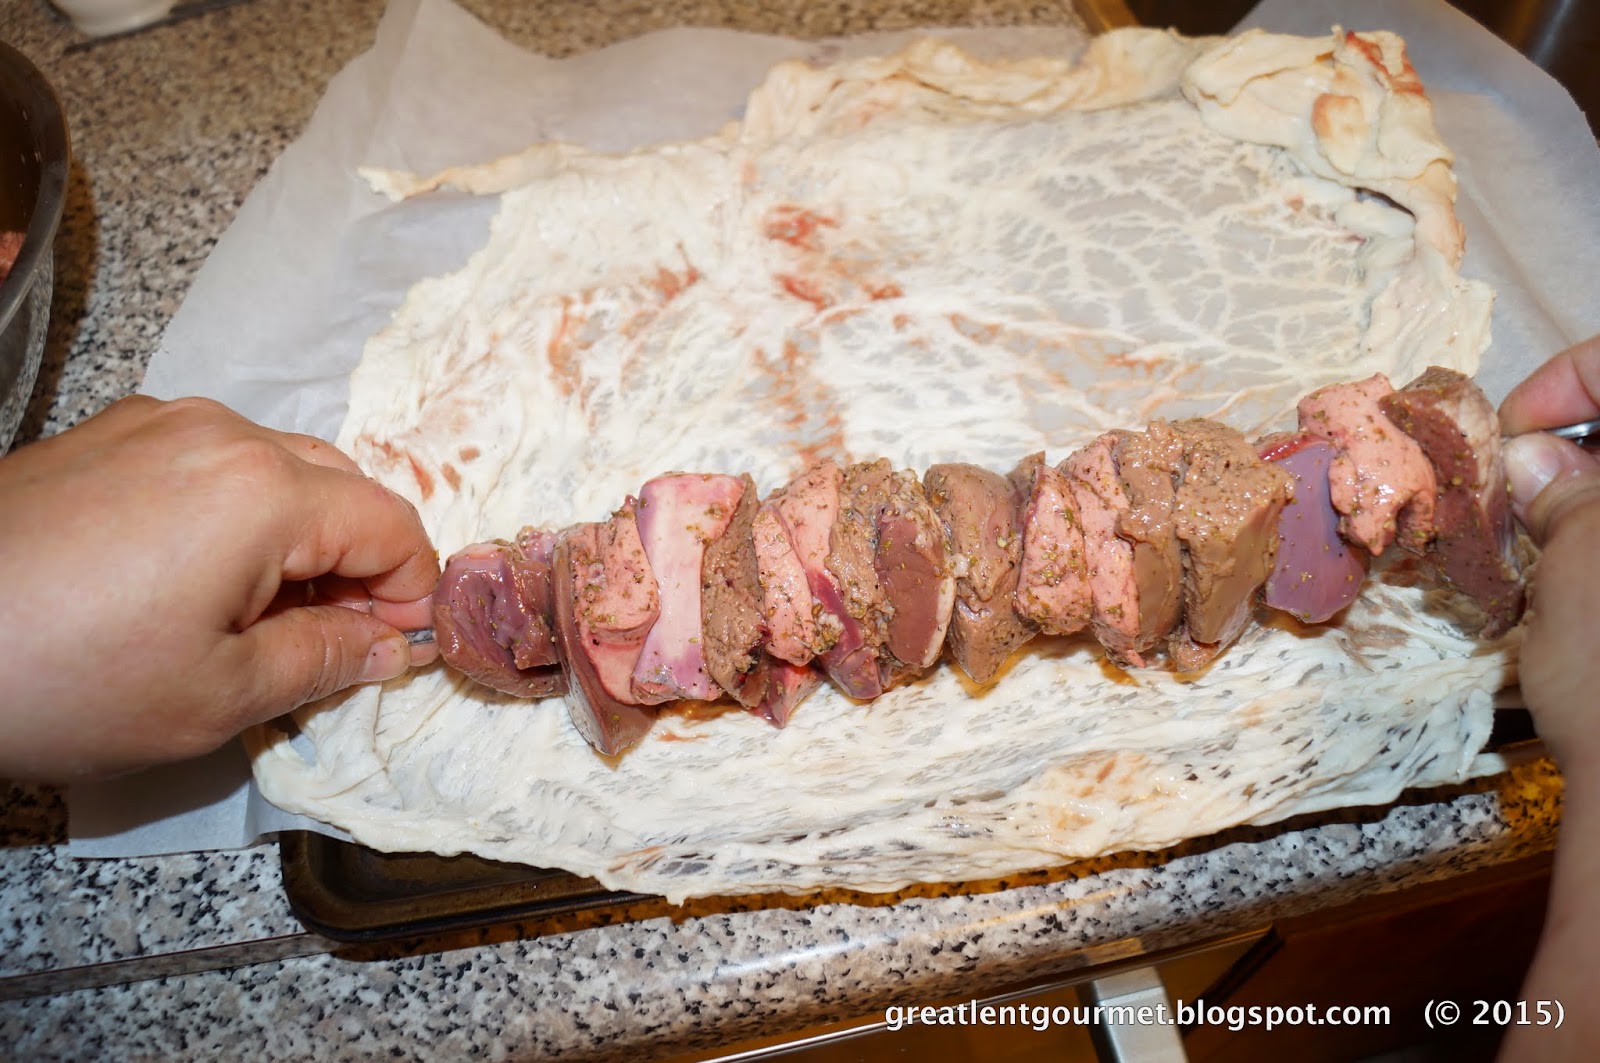
Carefully stick the skewer into each piece of meat, trying to alternate kidney, lung, liver, heart, kidney, lung, liver, heart… This way, each skewer is very alike (not quite identical). When the skewer looks like it is full, squeeze together the pieces, trying to condense them into a shorter length.


When the skewer is assembled, lay it on the sheet of caul fat. Center it the best you can. Fold up the bottom end of the fat, covering the top of the skewer. Then, roll the skewer until it is fully covered. Tuck in the ends of the fat toward the middle of the log. This will all be tied off with intestines, so if you have a little excess on the ends, do not worry. Cut off the extra caul fat on the side, after making one layer of fat on the skewer. Scissors work better than a knife for this. Leave a bit of overlap on the skewer, just to make sure that all the meat stays covered for the tying process.


Once all the meat has been used, and all the skewers have been wrapped in fat, it is not time to make the bundles and tie with intestines. We tie these for two reasons. First, it is to hold together the pieces of meat inside the layer of fat. The second reason is to try to squeeze the meat into a cylinder that is more uniform in width for the whole length, which will lead to more even cooking.
Using the clean intestines, find one end. Start by tying one end of the intestines to one end of the skewer. Because our skewers have an open circle or square at the handle, we had a given place to tie the intestines. If you do not have it, then tie them directly on to the skewer.
Start by lightly tugging the intestines down the length of the skewered meat. Then, return to the top. Allow for three or four repetitions up and down the length of the skewer.


Next, still using the cleaned intestines, wrap around the girth of the roll, going around and around for the whole length of the skewer.
Now, come back up the length of the kokkoretsi, wrapping intestines around and around the girth. You will see a pretty pattern develop. After four vertical and two times on the horizontal wrapping, cut the second end of the intestines and tie them to the tightly wound intestines on the kokoretsi.


Next, it is time to wrap the intestines around the girth of the kokoretsi. This means that you need to go round and round and round the width, for the entire length of the skewer. And, then, to make sure that you are pulling in and tightening all the pieces of meat inside, and you are trying to make a more even cylinder, wrap the same way back up the length of the skewer, which will form a nice pattern. You do not have to cover the entire kokoretsi with the intestines, but you have to tie enough to keep all the pieces in place and to make a rather even cylindrical shape.
While wrapping the kokoretsi, you may experience the intestines breaking, or having a piece that is too short. If that happens, you can tie the ends together like a shoe lace, and continue with your task. Once all the skewers are wrapped with intestines, we need to wrap them in plastic to keep in the refrigerator over night. This will give the kokoretsi a chance to marinate in the seasonings and caul fat.


Wrapping kokoretsi in plastic is easy, since it is done the same way as wrapping the skewer in caul fat. Cut the piece of plastic wrap longer than the length of the skewer. Now, roll the skewer so it is fully covered with plastic. Twist the two ends closed.
Now, cut one more piece of plastic twice the length of the skewer. Wrap the kokoretsi the other direction, from tip to handle of the skewer. This will make sure that all the seams are covered with plastic wrap, and hopefully will help the liquid stay inside until tomorrow. Just to be sure, put the wrapped kokoretsi on a tray before putting it in the refrigerator. Then, say an extra prayer for the patience to wait for tomorrow when we can cook and eat these home made specialties.


These two photos were taken during the Resurrection Service, Holy Saturday 2015 (April 11/12)
at Metamorphosis Greek Orthodox Church, Toronto, Canada


