Saturday 19 April 2014

Day 48: Preparing Kontosouvli for Easter Celebration - Προετοιμάζοντας το Κοντοσούβλι Για το Πάσχα - April 19, 2014


We usually have lamb for Pascha.  That is the traditional main dish, served with sides including ham, eggs, bread, cheese and anything else that family brings to the table.  This year, one of the things we are including on the dinner table is Kontosouvli (κοντοσούβλι).  It is a lovely collection of pork that can be eaten as an appetizer, side dish, main dish, or snack.  It seems appropriate for any feast day after not having any meat for so long!  And, today, we are preparing the kontosouvli to grill tomorrow several pounds of pork to share with family and neighbours!

This recipe, as with any recipe for meat at Pascha, is our interpretation.  There are a thousand different ways to marinate the meat, to skewer it, and to roast it.  This is the way that we were taught, and the way we know, but are open to learning how others make this and how we could make our kontosouvli differently.  After all, it is about sharing!

So, first, we want to explain that there are two types of pork that can be used for this dish.  First, you could choose the pork shoulder, which is the lower part of the pig shoulder.  It is covered with a layer of fat that will melt while grilling, leaving the protected meat nice and juicy.  Next, you could choose the pork butt.  This is also a part of the shoulder, but it is the upper part.  It is also known as Boston Butt.  This cut is connected to the shoulder blade, and has a lovely marbling of fat throughout the meat.  This allows the marbling to melt and leave all the meat parts inside tender and juicy.  So, when you roast this on a grill, you get a little crispiness on the outermost layer of meat and tender juiciness inside.  Do not get the pork picnic shoulder!  This may be used in a roast or a roll, but this cut is the one that is cured, salted, and/or smoked.  That is not the type of cut what you want for a kontosouvli.

If you go to a Greek butcher, he (or she) will know the better cuts to use for this -- all you have to do is tell them what you are making.  If he (or she) is not Greek, then explain that you want to make jumbo souvlakia, and you will get the right cuts of meat.

We had the butcher cut the pieces for us. He expressly recommend the capicola cut (also known as coppa). The pieces he cut are big enough to fit on a skewer, but not quite big enough to put on the metre-long (about 3 feet long) souvla we use for the lamb (rotisserie grill).  Therefore, we will likely put the skewers directly on the charcoal grill and flip them by hand to make sure they are evenly cooked on all sides.  This will take some time, but it will be worth it to have that freshly barbecued flavour.  Each chunk of meat was approximately the size of a lemon.  You want them this size or larger, depending on your skewers.  Since we are doing this by hand, we opted for the lemon size which is small enough to handle but big enough to count how many pieces per person for an appetizer, the same number of pieces per person for a snack, twice as many pieces per person for a main dish.  The number of pieces you use will depend on who you are feeding, how long of a day you have together, and what else is being served.  For us, we know that this will be a side dish or a snack, so we are counting two pieces of meat per person.  When it comes to cutting the meat to the right size, you can cut the pork shoulder yourself, or ask the butcher to do it for you.  If you have a good butcher, let him do the hard work!

Since the meat is cut for you, start by making the marinade.  There are many folks who add a lot of ingredients to a marinade that will eventually overpower the taste of the meat.  We love the taste of pork, so we opted for a simple marinade that includes the following ingredients:

Olive Oil and Vegetable Oil
Garlic Powder
Salt
Montreal Steak Spice
Oregano (we alway use Greek oregano as it has the strongest flavour intensity of all oregano varieties).
Lemon Juice


Start by putting the garlic powder and Montreal steak spice in a bowl (if you can't get your hands on Montreal steak spice, here is a 'how-to' to make your own).  This is our special ingredient that we add to almost everything meat related!  Of course, you could use plain ground pepper, but steak spice is more exciting.

Now, add the lemon juice.  Here, we used the bottled lemon juice for the marinade.  You want enough acid to penetrate the meat, and we will use actual lemons for dressing the meat when it is cooked, but for the quantity of lemon juice used in the marinade, you get better value from the bottle. Squeeze enough lemon to fully cover and submerge the spices.  This gives the garlic and the steak spice a chance to rehydrate before getting mixed into the oil.


Add a little salt.  Salt is used in the marinade to help tenderize the meat and help the acid (lemon juice) to penetrate into the meat.  You also want to add a little salt to round out the flavours of the lemon and oregano.  There is something about that sprinkle of salt that binds the flavours together.

Then, add the oregano (we use Greek oregano as it is the most flavourful of all the varieties in many users' opinion, including our own).  Add enough oregano to just taste a hint.  After it has been sitting for a day, the oregano flavour will get stronger.  But, if you add too much, the lovely herb can become bitter and overwhelming.  That is not the main flavour that you want to have on the pork.  Also, we will be brushing the meat with a similar dressing when it is cooked, so you can make up for light oregano on the other end of the cooking process.  Now, check the seasonings.  This is the point when you can adjust how much lemon, salt, garlic, steak spice, or oil is right for you.  Our marinade is heavy on the garlic and lemon right now, but that will all be balanced after the pork is cooked.  Whisk the marinade well.

Next, add oil to the marinade.  We used a combination of vegetable oil and olive oil, although we are showing only the olive oil in the picture.  Vegetable oil does not solidify in the refrigerator as does olive oil, so as the meat is marinating for a day, the marinade remains in its liquid form.  But, the olive oil has the beautiful flavour we want in the meat, so add enough olive oil to taste, but not enough to solidify the marinade.  Whisk this all together until the ingredients begin to emulsify (stay together).


Once the marinade is all mixed, and it looks like all the ingredients are holding together as one, it is time to add the meat.  Add meat to the marinade.  We took our chunks of pork and dipped them into the marinade.  Then, to put them in the refrigerator overnight, we put the dipped meat into zipper seal bags.  This helped to remove the air pockets from the container so that the chunks of meat are fully covered with marinade and they will breathe and swim oil, lemon, and oregano to fill all of the nooks and crannies in each chunk.  If you notice, while moving the chunks of pork to the zipper bag, the marinade collects inside the bag.  By dipping the pieces instead of just pouring marinade over them, you assure that every side of every chunk is coated and will get some of the flavours.  Put the filled zipper bags in the refrigerator overnight (or two nights is even better!).


Now, put the meat in the refrigerator overnight or for two nights, and allow the meat to marinate.  You may think about flipping over the zipper seal bags so the marinade and spices are re-distributed to the other pieces of meat on the top.  Or, if you are marinating in a bowl, stir the contents once or twice to make sure the spices stay evenly distributed across the meat.

Until tonight, Kali Anastasi!

Friday 18 April 2014

Day 47: Getting ready for Pascha: Tiropita - Ετοιμάζοντας για Το Πάσχα - Τυρόπιτα - April 18, 2014


Phyllo is something we don't usually have in the house.  We buy it when we need to make something with it, or we (on very rare occasions) have tried to make it at home.  Buying it is easier and takes a lot less time!  The time is typically used when trying to decide which phyllo to purchase.  One type of phyllo is the extra fine or thin sheets.  These are light, airy, and very delicate.  These are great for when you want a lot of flaky crust on your product.  The second type of phyllo is the regular sheets.  There are 12-15 sheets of pastry in the box, and these are the ones that you will usually find in any store.  The phyllo sheets are a medium thickness and easy to handle and work with, but still delilcate.  Then, there is the third style of phyllo -- the country style.  By its name, it sounds hearty and strong, which it is.  There are 8-10 sheets of phyllo in the box and they are thick and rather durable.  None of the styles of phyllo are forgiving when they are cold, though, so make sure that you thaw them completely before use.
We bought the country style phyllo because we thought that we would use a fewer number of phyllo sheets in the tiropita and have some phyllo left over to sneak in a quick pan of something else.  Well, we did use fewer sheets, but we just made more tiropita!  And, we put it in the freezer, planning to bake it for Pascha.  Tiropita will freeze raw for up to 4 months with no affects on the quality.  Make sure it is air tight and really well wrapped!

Making tiropita is not that difficult or involved, outside of layering the phyllo sheets.  If you have worked with phyllo before, then you know that you have to be gentle and patient while working quickly.  Regardless of the thickness of phyllo, the pastry sheets dry very fast while sitting out on the counter uncovered, so that encourages the cook to work quickly.  You should have everyhthing else in order and ready to use before opening the package of phyllo.

The recipe we are providing is probably one of the mos basic recipe for tiropita.  It is the one we learned when young, when we wanted to be in the kitchen with Mom or Yiayia, helping in some way, really hoping to lick whatever spoon was coated with soemthing yummy…  So, as an introduction to making tiropita, this will get you a very good product which you can tweak, adjust, or enhance with your own special tricks!  If you read cookbook recipes for this, some will use a variety of cheeses, some will even include cream cheese, others add five or six seasonings -- it is too much for us.  When we eat tiropita, we want to taste the cheese and the phyllo, maybe a little mint.  We want a little salty and crisp.  That is what this recipe will get you -- a little salty, cheesey, crispy treat with a hint of mint.


For this recipe, you will need the following:

2   300 g containers  ricotta cheese
2-4 ounces feta cheese
sprinkling of parmesan or romano cheese
2 eggs
1 teaspoon dried, chopped mint
8-10 sheets phyllo dough
melted butter

Start by making the filling.  The filling base is ricotta cheese.  In the past, we have been known to mix half ricotta and half cottage cheese, but this day, we were lucky to have the two containers of ricotta cheese.  Mix the ricotta in a bowl to make it creamy, then add the feta cheese.  Ideally, the feta would be crumbled.  However, our feta was so firm that it was not crumbling at all.  So, we cut it into cubes which we smashed with a fork in the mixture.  We could have also put this in a mixer, food processor, or used an immersion blender.  But, we were playing old-school with our fork.  It is good to put technology aside once in a while!  Mash the ricotta and feta well.  The parmesan is for the assembly process only, and is not mixed into the ricotta.


Now, sprinkle some mint in to the cheese mixture.  You want enough mint to taste, but not enough to be overwhelming.  Make sure that it is well incorporated into the cheese.  We add the mint before the eggs so the mint has a moment to reconstitute from the moisture of the cheese.  If you are using fresh mint, this will be a step to say add the mint then add the eggs.


Add the eggs to the cheese and mint mixture.  Mix this well enough to blend the eggs completely with the cheeses.  You should not be able to identify one cheese over another, nor should you see any raw egg in the mix.  If you want a very fluffy tiropita, you would add one extra egg.  The eggs bind the cheeses together as well as they bake fluffiness into the tiropita.  So, this will give you a standard height, but if you want more fluffiness, add more eggs.

Set the filling aside for now, and get ready the next items.  Melt a cup of butter.  You can use salted or unsalted, it does not matter too much.  Melt the butter in a cup or bowl large enough to get a pastry brush dipped in there.  And, make sure that your phyllo is open and fully at room temperature.  This is the point when you want to see that your baking dish and your phyllo sheets are relatively the same size.  We cut our phyllo sheets in half so they were close to the same size as the glass baking dish.  Then, for the top layers, we trimmed a little more off the edges so they were exactly the same size as the baking dish.  It will not matter if you have some "extra" on the bottom layers, but the top layers must look beautiful.


Line up your work station with phyllo, butter, and baking dish.  The filling should be in arm's reach.  Begin by brushing the baking dish with butter.  This is a good place to use the foamy top of the melted butter.  Make sure to fully coat the bottom and the sides, paying particular attention to the corners.  This layer of butter will prevent the phyllo from sticking to the pan once it is baked.

Lay the first sheet of phyllo dough.  It should reach up the sides to keep all the cheese filling inside and not oozing out of the pastry.  Brush the sheet of phyllo with butter, once again, making sure to coat the corners.  Then, lay the next layer of phyllo and brush that with butter.  You will lay a total of 4 thick sheeets or 6 medium thickness sheets, or 8 fine sheets of phyllo for the bottom of this pita.  The last layer you put should be fully coated with melted butter.  This is also a good place to "hide" any remenants of phyllo that you have (the parts that you cut off the large sheets).  You can position them to make the small pieces the same size as the full sheet of phyllo.


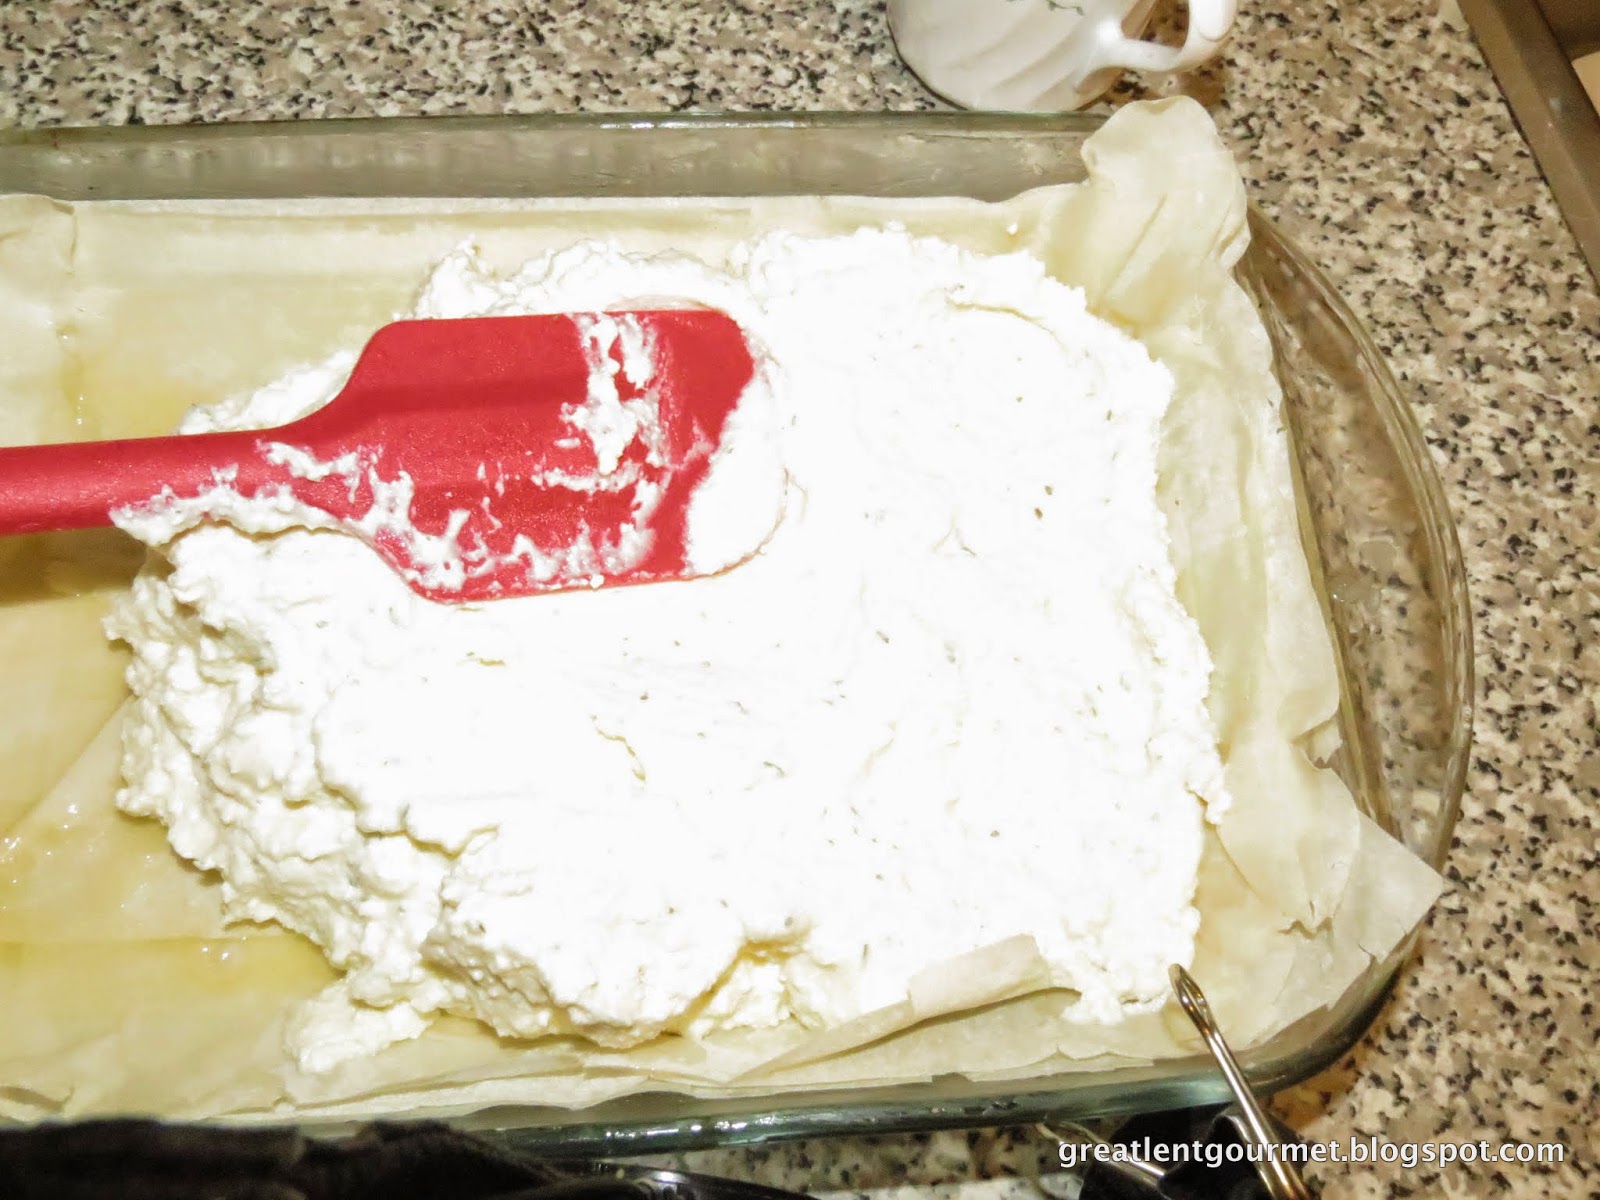
Now, put the filling into the pan.  Spread it around so it is a level (ish) surface.  Try not to press down too hard so not to flatten any air that was incorporated while mixing.  Once again, make sure the filling reaches the corner of the pan.

Next, sprinkle a layer of grated parmesan (or romano) cheese all over the top of the cheese filling.  It shoudl be a thin layer, but enough to be seen.  This will melt in the oven, so you do not have to worry about it mixing into the ricotta filling.  Lay one sheet of phyllo on top of the cheese layers, and brush that with butter.  Any phyllo that was built up on the side of the pan should be tucked in now.  Just fold it over so it lays on top of the filling.  This does help keep all the cheese inside the pita.


After the filling is in place, and the edges are tucked in, it is time to layer the next 4-8 sheets of phyllo dough.  Use the same method of laying the phyllo, brushing with butter, laying phyllo, brushing butter, and so on.  Remember, the top layers are the ones that must look pretty and flat and the right size for the pan.

Generously brush the top layer of phyllo with butter.  Then, go back and brush a little extra butter along the edges and in the corners to assure there is nothing sticking on the sides of the pan.


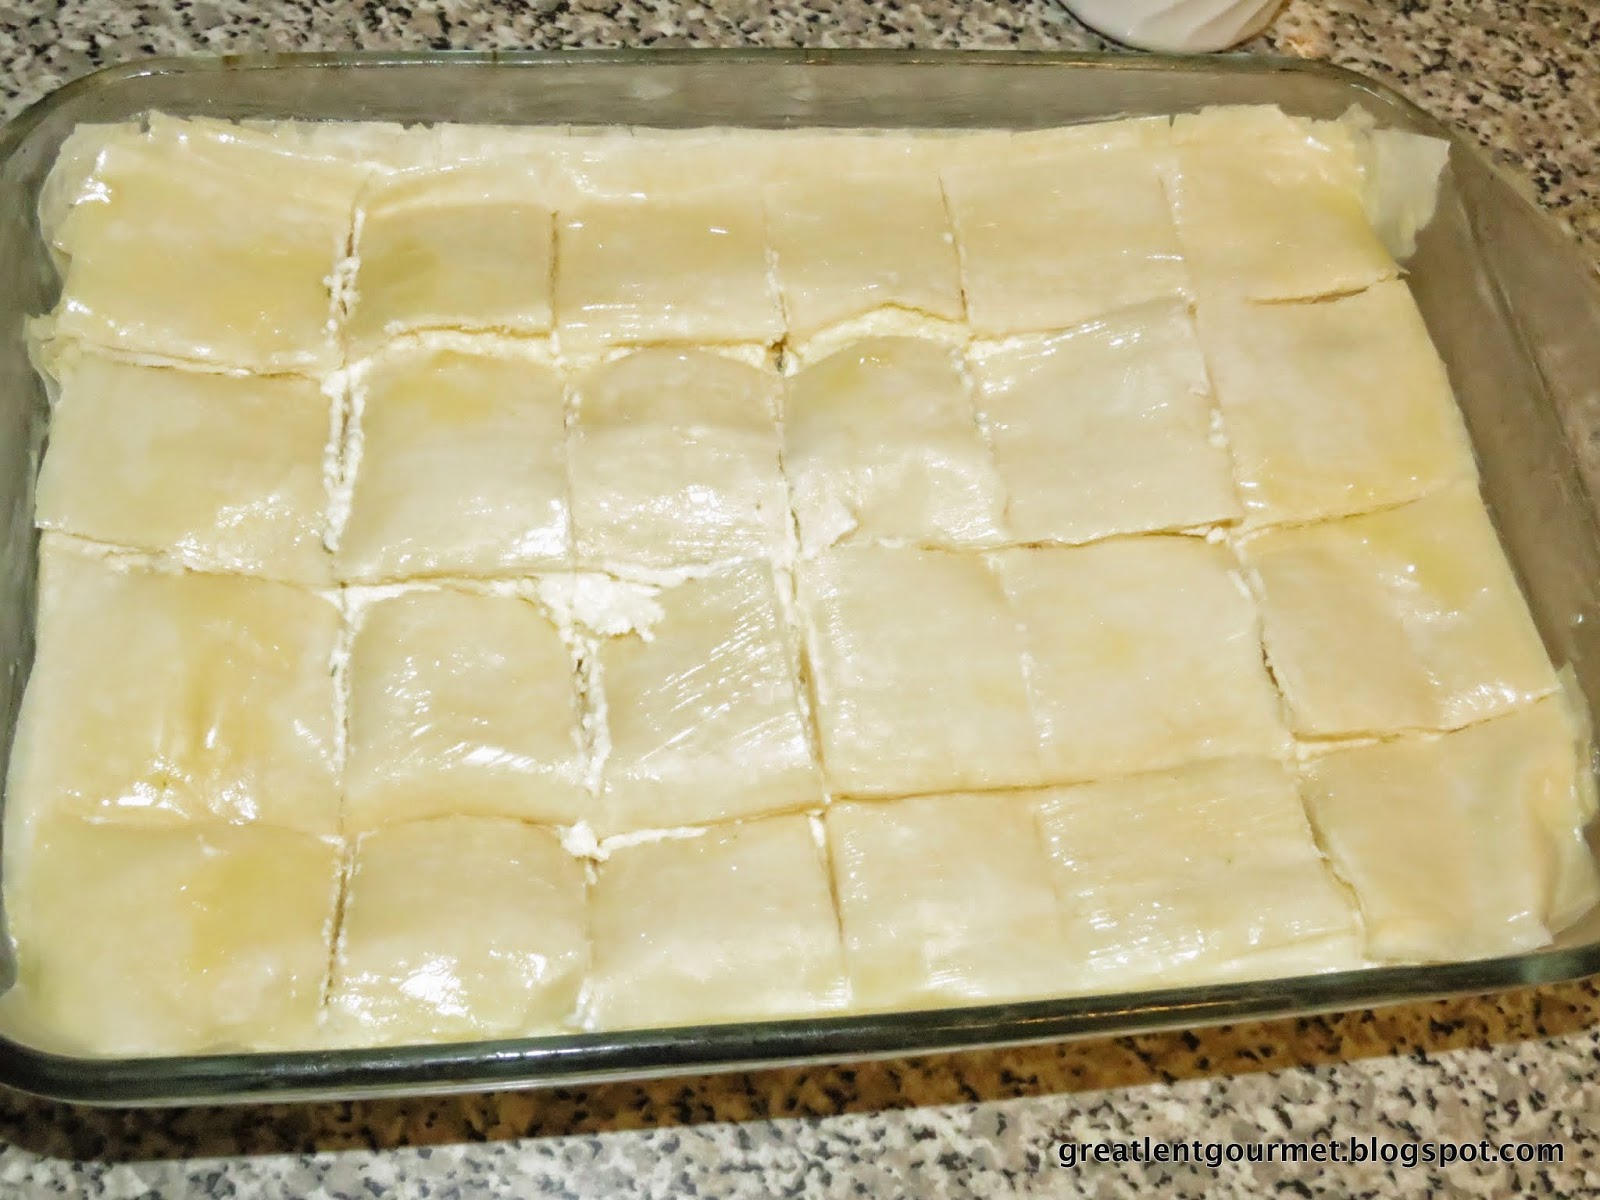
Next,  you have to cut the tiropita -- not only score the top, cut through the bottom of the pita.  Use a sharp knife for this because the phyllo will stick to the blade.  Also, continue to clean off the blade after each cut so that you do not carrry the cheese filling on to the top of the pita.  Cut pieces that are whatever size you want to eat.  We often cut 2 inch by 2 inch (5 cm x 5 cm) squares to keep the pieces appetizer sized.  The important part is to cut all the way through the bottom phyllo layers.


You can bake this pita at 350º F (175º C) for 40 minutes, until the filling is firm and the top is golden.  Or, you can wrap the pita very well and freeze this for up to four months and use it at a later date.  For the purpose of this blog, we baked one pan to show the beauty of this pita, but we made a second one to put in the freezer!  Now, we are prepared for Pascha with a lot of tiropita!


Εγκώμια Μ Παρασκευής - Good Friday Egomia (Eulogies)

Thursday 17 April 2014

Day 46: Homemade Vegan Hilopites (Flat Square Noodles Without Eggs) - Σπιτίσιες Χυλοπίτες Δίχως Αυγά - April 17, 2014

The pale colour seen here in today's entry is due to the lack of eggs in the home-made hilopites (flat noodles). Once dried, we use them just as we would with regular store bought flat noodles.
You may look at this post and wonder why would anyone make hilopites -- they are inexpensive to buy and easy to find?  But, if you read the ingredients, you will learn that traditionally hilopites are egg noodles.  That means we should not be eating them through Great Lent, so if we want hilopites, we need to find a Lenten version.

From one of our newest favourite cookbooks, Foods from Many Greek Kitchens, we found a version of hilopites that does not include eggs, but is a rather good substitute for the egg noodle.  So, we decided to roll out noodles as did our ancestors, with flour, salt, and water.  This recipe did have a little oil, and for that you can use any oil you want, but we found that the oil was needed for the overall texture.  And, although it took some time to roll and dry, making this recipe was kind of fun.  It would also be a great project to do with children or friends.  We made enough to make this a side dish for 4 people.  You can adjust the recipe as you need.

For this recipe, you will need the following:

1  1/3 cup flour
pinch of salt
3 teaspoons oil
water, as needed


Mix the flour and salt in a bowl.  Mix it well enough for the salt to be evenly distributed throughout the flour.
Then, add the oil.  Try to mix the oil around very well in the flour.  You will see lumps start to form, and that will be the indication that it is time to add the water.


Add a little water at a time.  That is, add about 1/4 cup water first, then if you need more, add another 1/4 cup, then if you need more, add another 1/4 cup… until you get a soft dough consistency.  In total, we added almost 1 cup of water.  This amount will change based on the age of the flour and the type of flour (we used all purpose, but you can use bread flour or a rice flour -- both will take different amounts of water.

Mix these ingredients together well enough to form a soft dough.  The dough should be soft but not very sticky.  It will come together into a ball.

Knead the ball of dough until it is smooth.  Knead for about 10 minutes.

Cover the dough with a towel or with plastic wrap and set it aside to rest for 30 minutes.


Now it is time to roll out the hilopites.  This should take you about one hour to roll them, cut them, and start to dry them (because they need to dry before cooking).

To roll out the dough, start by sprinkling some flour on your work surface.  We worked directly on the kitchen counter.  Sprinkle just enough flour to roll out the dough so it does not stick to the counter top.  Then, using a rolling pin, roll out the dough to a rectangle.  The dough should be less than 1/4 inch (about 0.5 cm) thick (see the picture).  We could see through the dough, but it still held together.  Thin is the key.

Continue to check the dough for stickiness, and dust flour on top and the bottom of the rolled dough.  You want to make sure the dough is not sticking to the work surface nor to the rolling pin.


When you get the dough rolled out to less than 1/4 inch thickness, and it looks even all over, then it is time to cut the hilopites.  Some people have the talent of being able to cut straight lines.  We are not so blessed.  So, with the help of a ruler, we are able to cut straight lines and keep them as evenly spaced as we can.  The strips of dough that we cut are thin, trying to stay to the traditional size of hilopites, which is small (1/6 inch square).  However, we also know that hilopites can be cut larger or smaller, depending on your preferences.  Begin by cutting all the rows.

Another note: we used a pizza cutter, but a knife would have been just as easy to use.  There are all kinds of tools that you can use to cut dough.  We chose the pizza wheel because it rolled along side the ruler with ease, and it was a little less thinking for us.


Once all the rows are cut, it is time to cut horizontally (across) to make the squares.  This is the tricky part because fresh dough will move with you.  You have to find a way to hold the row in place while cutting across them.  This is where the ruler helped in keeping the rows of dough in place for us.  You could also do a portion of rows at a time.  Just be careful not to squeeze the dough too hard because it will stick to itself, and perhaps even your knife.

Try to stick to the same measure that you used while cutting the first time.  You want the hilopites to be as square as you can, and you want to make them the same size all the way through.


Once the hilopites are cut, leave them on the counter to dry.  We left ours on the counter overnight, and we used them the second day.  They were not as dry as we would have ideally made them.  Typically, hilopites take two to three days to dry all the way through the center, to the level of dryness of the ones in packages at the store.  But, we have known folks who do not dry them at all and cook very fresh pasta, which really has a different texture.  You'll have to decide which is right for you.  One Yiayia would put the dough on a bed sheet on the table, and cut the squares on the bed sheet.  Then, she would be able to move the sheet to set the table, and put the sheet back after each meal.  That sounds like it would be convenient, and something we may try next time!

After the hilopites have dried and they have no moisture left, you can put them in a zipper storage bag to keep for when you want or need them.  If we had made traditional hilopites with eggs (egg noodles), the drying process would be key in determining the shelf life of these lovely little noodles.

Cook the hilopites as you would any pasta.  Boil them in lightly salted water, drain the water, and then mix them with your favourite sauce.  We have fond memories of the smell of burning butter when we think about hilopites.  It was the usual topping to burn butter, mix it with the noodles, and top that with a little bit of grated cheese!  In another week, we will be able to enjoy that!  Now, we will focus on our favourite tomato sauces to pour over our homemade efforts.


Η ζωή εν τάφω-Πέτρος Γαϊτάνος (Life in the tomb - Petros Gaitanos)