
Phyllo is something we don't usually have in the house. We buy it when we need to make something with it, or we (on very rare occasions) have tried to make it at home. Buying it is easier and takes a lot less time! The time is typically used when trying to decide which phyllo to purchase. One type of phyllo is the extra fine or thin sheets. These are light, airy, and very delicate. These are great for when you want a lot of flaky crust on your product. The second type of phyllo is the regular sheets. There are 12-15 sheets of pastry in the box, and these are the ones that you will usually find in any store. The phyllo sheets are a medium thickness and easy to handle and work with, but still delilcate. Then, there is the third style of phyllo -- the country style. By its name, it sounds hearty and strong, which it is. There are 8-10 sheets of phyllo in the box and they are thick and rather durable. None of the styles of phyllo are forgiving when they are cold, though, so make sure that you thaw them completely before use.
We bought the country style phyllo because we thought that we would use a fewer number of phyllo sheets in the tiropita and have some phyllo left over to sneak in a quick pan of something else. Well, we did use fewer sheets, but we just made more tiropita! And, we put it in the freezer, planning to bake it for Pascha. Tiropita will freeze raw for up to 4 months with no affects on the quality. Make sure it is air tight and really well wrapped!
Making tiropita is not that difficult or involved, outside of layering the phyllo sheets. If you have worked with phyllo before, then you know that you have to be gentle and patient while working quickly. Regardless of the thickness of phyllo, the pastry sheets dry very fast while sitting out on the counter uncovered, so that encourages the cook to work quickly. You should have everyhthing else in order and ready to use before opening the package of phyllo.
The recipe we are providing is probably one of the mos basic recipe for tiropita. It is the one we learned when young, when we wanted to be in the kitchen with Mom or Yiayia, helping in some way, really hoping to lick whatever spoon was coated with soemthing yummy… So, as an introduction to making tiropita, this will get you a very good product which you can tweak, adjust, or enhance with your own special tricks! If you read cookbook recipes for this, some will use a variety of cheeses, some will even include cream cheese, others add five or six seasonings -- it is too much for us. When we eat tiropita, we want to taste the cheese and the phyllo, maybe a little mint. We want a little salty and crisp. That is what this recipe will get you -- a little salty, cheesey, crispy treat with a hint of mint.

For this recipe, you will need the following:
2 300 g containers ricotta cheese
2-4 ounces feta cheese
sprinkling of parmesan or romano cheese
2 eggs
1 teaspoon dried, chopped mint
8-10 sheets phyllo dough
melted butter
Start by making the filling. The filling base is ricotta cheese. In the past, we have been known to mix half ricotta and half cottage cheese, but this day, we were lucky to have the two containers of ricotta cheese. Mix the ricotta in a bowl to make it creamy, then add the feta cheese. Ideally, the feta would be crumbled. However, our feta was so firm that it was not crumbling at all. So, we cut it into cubes which we smashed with a fork in the mixture. We could have also put this in a mixer, food processor, or used an immersion blender. But, we were playing old-school with our fork. It is good to put technology aside once in a while! Mash the ricotta and feta well. The parmesan is for the assembly process only, and is not mixed into the ricotta.


Now, sprinkle some mint in to the cheese mixture. You want enough mint to taste, but not enough to be overwhelming. Make sure that it is well incorporated into the cheese. We add the mint before the eggs so the mint has a moment to reconstitute from the moisture of the cheese. If you are using fresh mint, this will be a step to say add the mint then add the eggs.


Add the eggs to the cheese and mint mixture. Mix this well enough to blend the eggs completely with the cheeses. You should not be able to identify one cheese over another, nor should you see any raw egg in the mix. If you want a very fluffy tiropita, you would add one extra egg. The eggs bind the cheeses together as well as they bake fluffiness into the tiropita. So, this will give you a standard height, but if you want more fluffiness, add more eggs.
Set the filling aside for now, and get ready the next items. Melt a cup of butter. You can use salted or unsalted, it does not matter too much. Melt the butter in a cup or bowl large enough to get a pastry brush dipped in there. And, make sure that your phyllo is open and fully at room temperature. This is the point when you want to see that your baking dish and your phyllo sheets are relatively the same size. We cut our phyllo sheets in half so they were close to the same size as the glass baking dish. Then, for the top layers, we trimmed a little more off the edges so they were exactly the same size as the baking dish. It will not matter if you have some "extra" on the bottom layers, but the top layers must look beautiful.

Line up your work station with phyllo, butter, and baking dish. The filling should be in arm's reach. Begin by brushing the baking dish with butter. This is a good place to use the foamy top of the melted butter. Make sure to fully coat the bottom and the sides, paying particular attention to the corners. This layer of butter will prevent the phyllo from sticking to the pan once it is baked.
Lay the first sheet of phyllo dough. It should reach up the sides to keep all the cheese filling inside and not oozing out of the pastry. Brush the sheet of phyllo with butter, once again, making sure to coat the corners. Then, lay the next layer of phyllo and brush that with butter. You will lay a total of 4 thick sheeets or 6 medium thickness sheets, or 8 fine sheets of phyllo for the bottom of this pita. The last layer you put should be fully coated with melted butter. This is also a good place to "hide" any remenants of phyllo that you have (the parts that you cut off the large sheets). You can position them to make the small pieces the same size as the full sheet of phyllo.


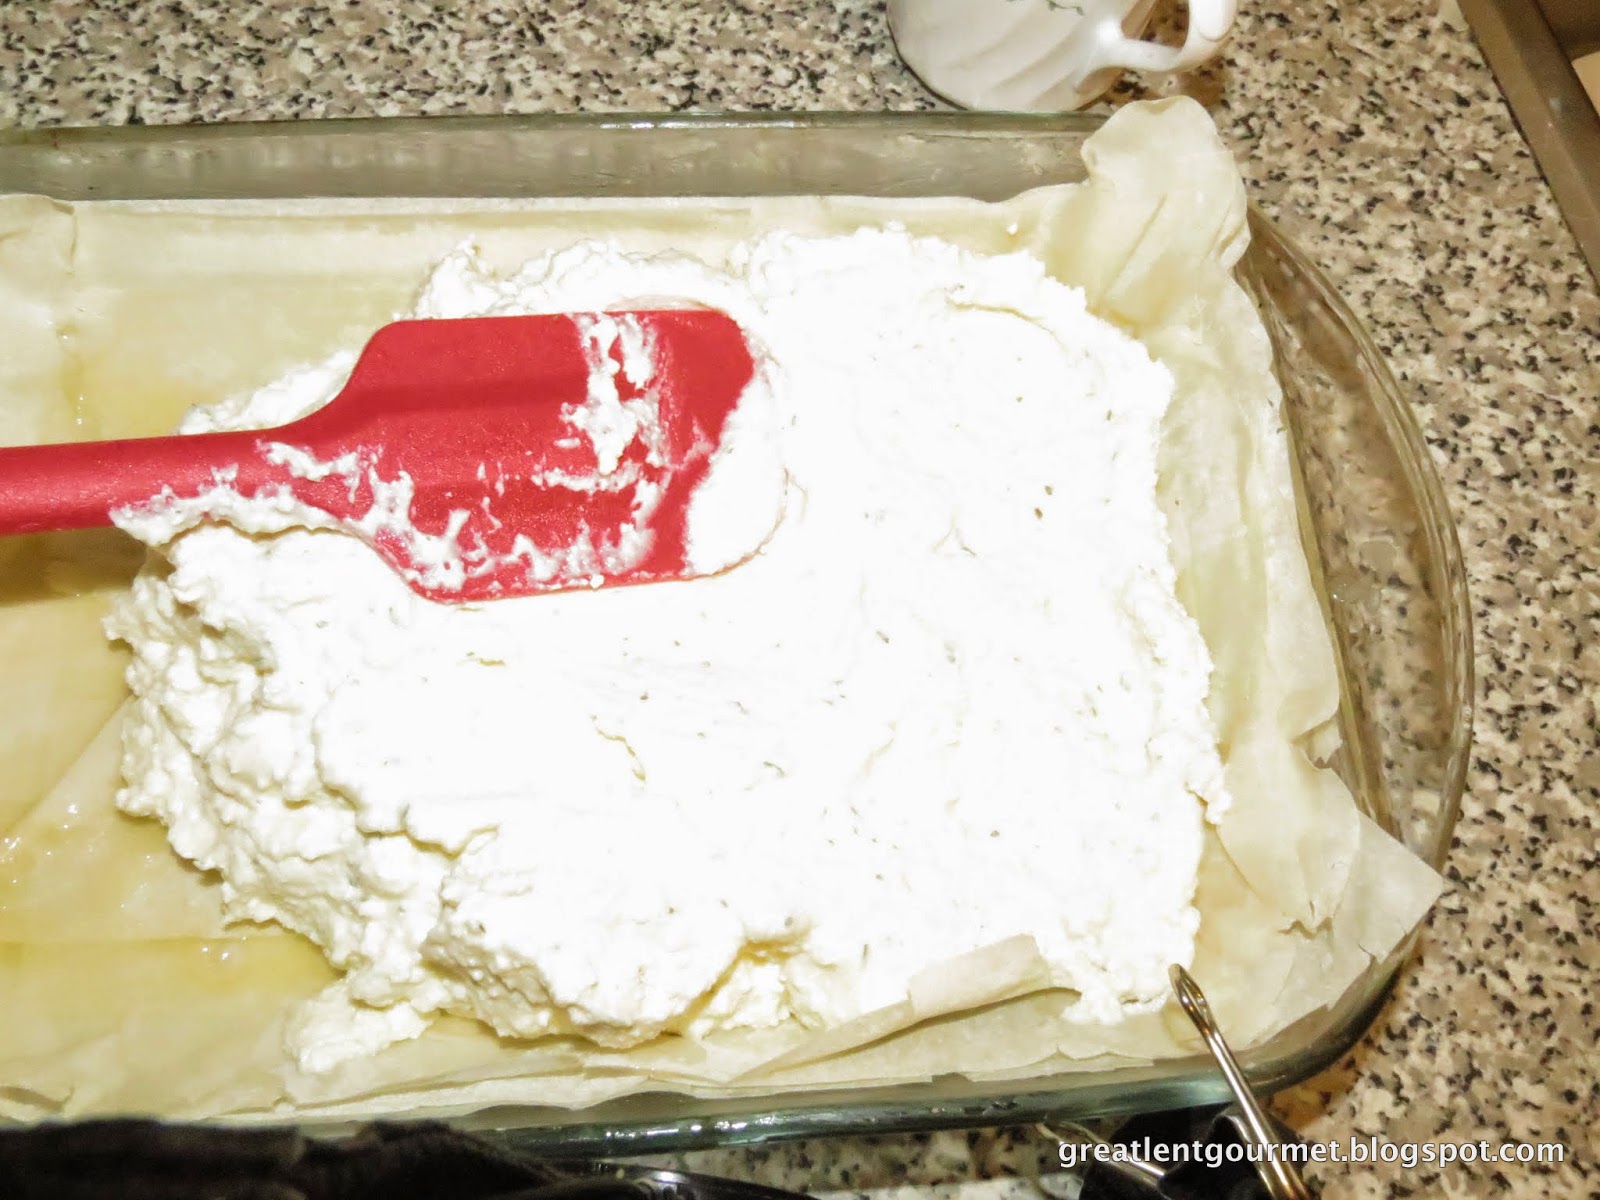
Now, put the filling into the pan. Spread it around so it is a level (ish) surface. Try not to press down too hard so not to flatten any air that was incorporated while mixing. Once again, make sure the filling reaches the corner of the pan.
Next, sprinkle a layer of grated parmesan (or romano) cheese all over the top of the cheese filling. It shoudl be a thin layer, but enough to be seen. This will melt in the oven, so you do not have to worry about it mixing into the ricotta filling. Lay one sheet of phyllo on top of the cheese layers, and brush that with butter. Any phyllo that was built up on the side of the pan should be tucked in now. Just fold it over so it lays on top of the filling. This does help keep all the cheese inside the pita.


After the filling is in place, and the edges are tucked in, it is time to layer the next 4-8 sheets of phyllo dough. Use the same method of laying the phyllo, brushing with butter, laying phyllo, brushing butter, and so on. Remember, the top layers are the ones that must look pretty and flat and the right size for the pan.
Generously brush the top layer of phyllo with butter. Then, go back and brush a little extra butter along the edges and in the corners to assure there is nothing sticking on the sides of the pan.


Next, you have to cut the tiropita -- not only score the top, cut through the bottom of the pita. Use a sharp knife for this because the phyllo will stick to the blade. Also, continue to clean off the blade after each cut so that you do not carrry the cheese filling on to the top of the pita. Cut pieces that are whatever size you want to eat. We often cut 2 inch by 2 inch (5 cm x 5 cm) squares to keep the pieces appetizer sized. The important part is to cut all the way through the bottom phyllo layers.


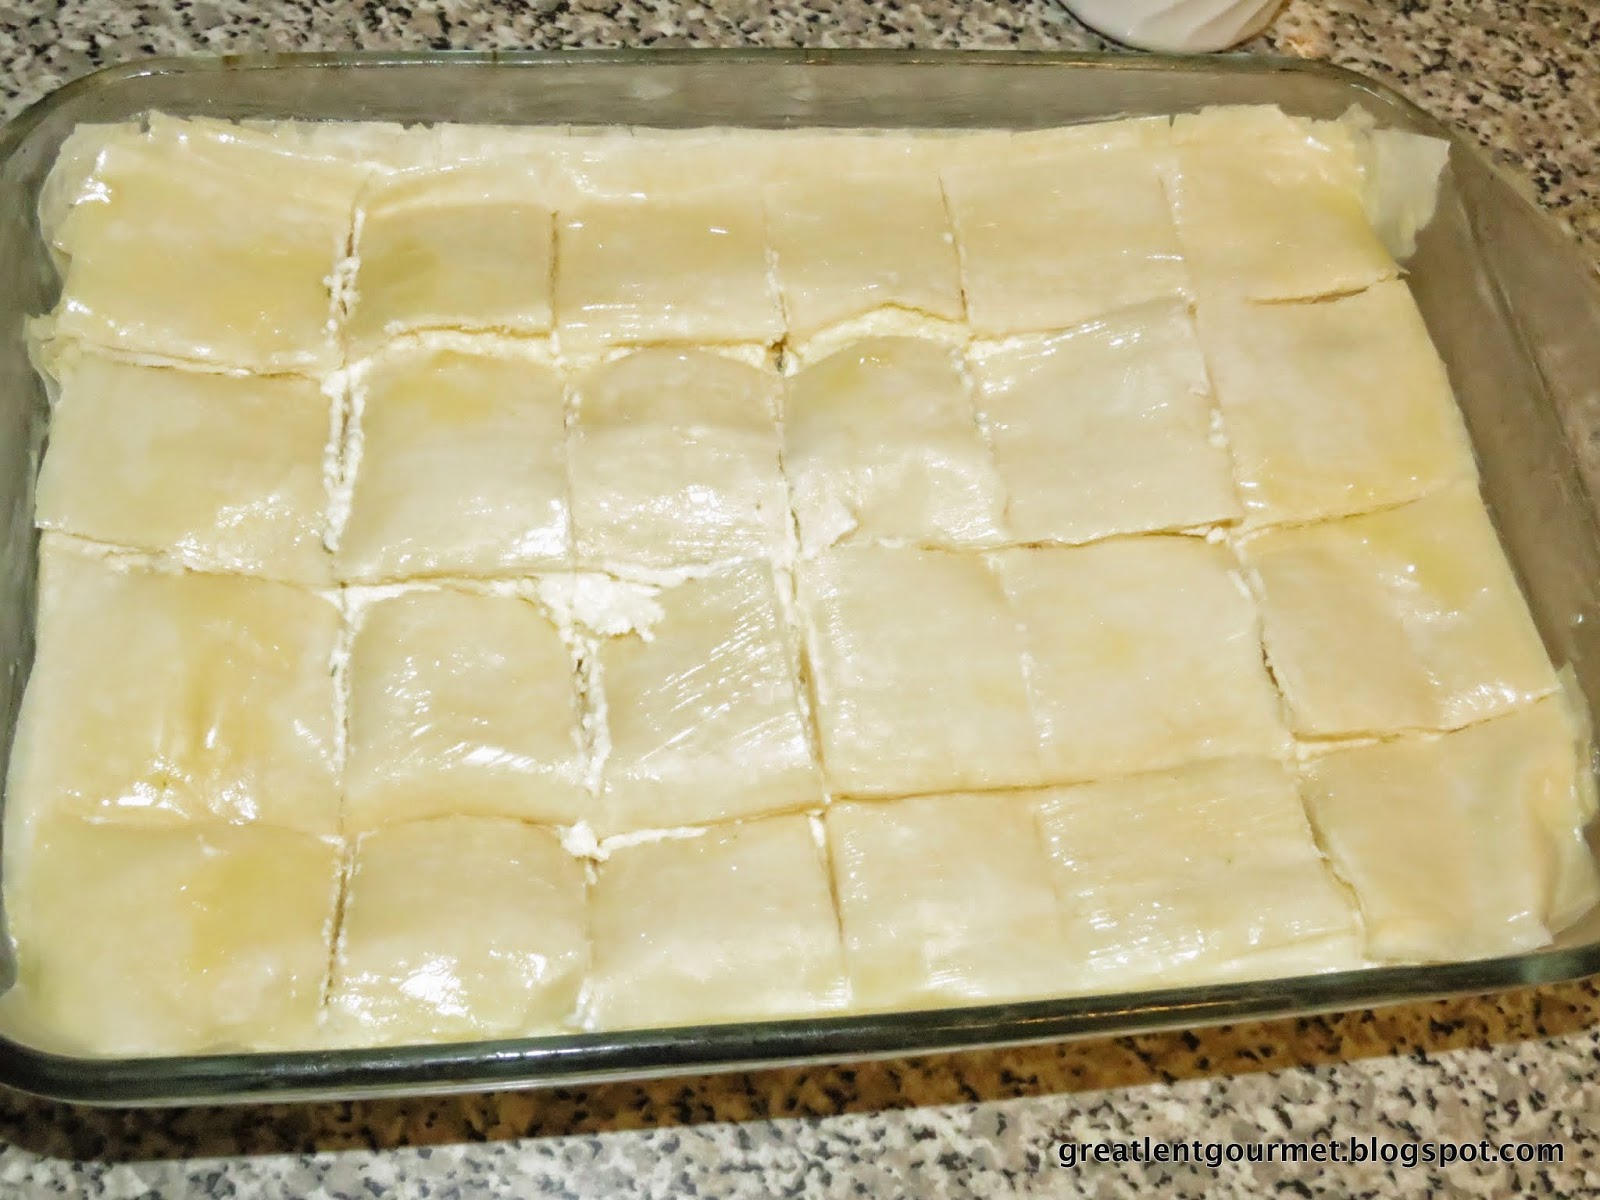
You can bake this pita at 350º F (175º C) for 40 minutes, until the filling is firm and the top is golden. Or, you can wrap the pita very well and freeze this for up to four months and use it at a later date. For the purpose of this blog, we baked one pan to show the beauty of this pita, but we made a second one to put in the freezer! Now, we are prepared for Pascha with a lot of tiropita!

No comments:
Post a Comment