Showing posts with label cinnamon. Show all posts

Monday, 1 April 2013

Day 15: Spicy Chickpea and Aubergine (Eggplant) Stew, April 1, 2013


Today's entry comes from a cookbook that we read often, but do not really use. But we found one recipe that seemed so interesting to us, and we would never have imagined putting eggplants and chickpeas together, that we had to try it.  The recipe is Spicy Chickpea and Aubergine Stew.  It comes from the book The Complete Book of Greek Cooking (authored by Rena Salaman and Jan Cutler).  This book has great photos and easy to follow instructions.  As mentioned, we read it regularly, and usually it sparks other ideas of what to make, but today, we were so drawn to this one recipe, we felt we had to try it.

Aubergines are eggplants and are common in so many Greek dishes.  Typically, we would call them melintzanes.  All over the Mediterranean, the eggplant is used in many dishes.  The variety of eggplants available today is tremendous, with white eggplant, American eggplant, Italian eggplant, and Chinese eggplant -- all have different shapes, colours, and bitterness levels.  The one step in this recipe that we found was so necessary was removing some of the bitterness from the eggplant.  That is done by cutting the eggplant and coating it with salt.  This draws out some of the liquid, therefore removing some of the bitterness.  There are some of us that like that sharp taste of eggplant, but in this dish, we wanted to taste the variety of spices used.  From what we read, the spices used in this stew are more common to northern Greece.


For this recipe, you will need:
1 large eggplant, cut into cubes
1 can chickpeas, drained and rinsed
2 Tablespoons oil
3 cloves garlic, chopped
1 large onion, sliced or chopped
1/2 teaspoon ground cumin
1/2 teaspoon ground cinnamon
1/2 teaspoon ground coriander
1 14 oz can chopped tomatoes
salt and pepper to taste


Start by cutting up the eggplant.  Dice it in even-sized cubes that will fit perfectly on a fork.  Then, put the cut eggplant in a colander or a sieve and coat the cubes with salt.  Allow this to sit over a bowl for at least 30 minutes to remove the bitter liquids.  The amount of liquid drawn out by the salt will vary depending on the age of the eggplant, the amount of salt, and the amount of time the eggplant sits.  Do not let it sit more than 1 hour because the eggplant will become completely mushy.


While the eggplant is draining, prepare your other ingredients.  Slice the onion into think strips.  Also, cut the garlic into fine slices or you can mince it through a garlic press  We liked the sliced garlic for appearances in the final product.  Some folks may find it easier to press the garlic or use the ready-minced garlic.  All are fine, as long as it equals about 3 cloves.


Now, heat the oil in a heavy bottom pot.  There should be enough oil to coat the bottom of the pot, without looking like we are deep frying anything.  Cook the onions and the garlic together in the oil.  We put a lid on the pan so we could sweat the onions, which also prevented them from becoming too brown in colour.  Cook until the onions become translucent.  Add a little sprinkle of salt and pepper to the onion mixture.

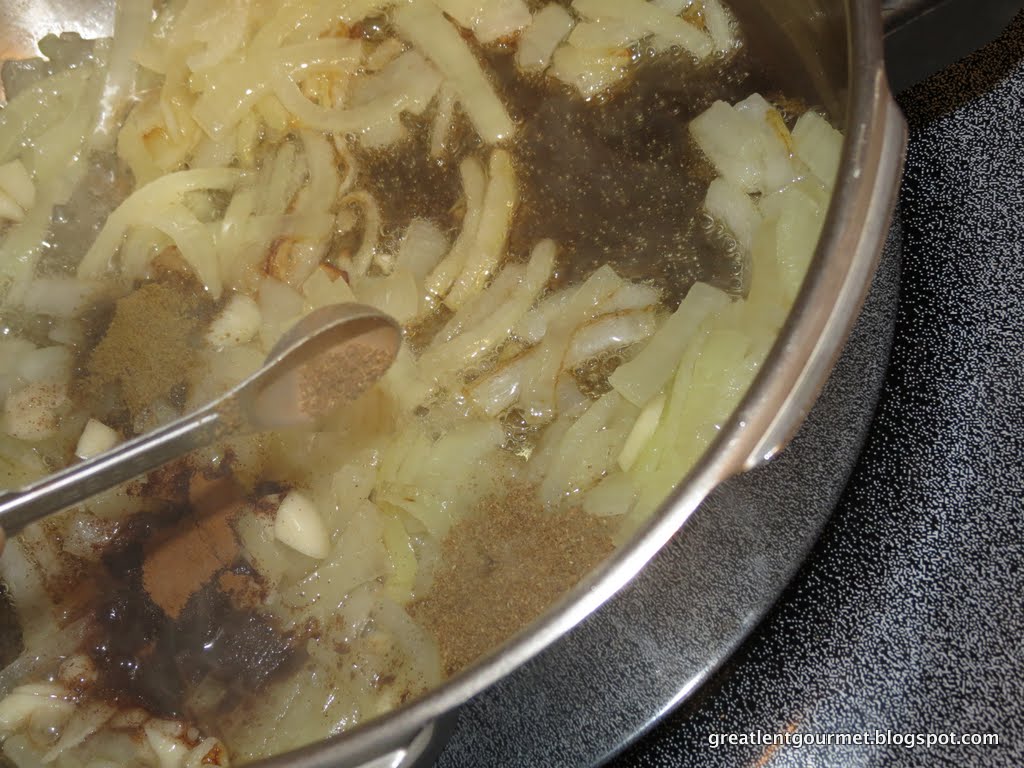
Now, add the spices of cinnamon, coriander, and cumin.  Wow!  You will have an amazing smell wafting through the kitchen.  Make sure the onions get fully coated with these spices.  You will see the onions turn a bit brown from the spices, but that's okay.  Just keep mixing so nothing sticks to the bottom of the pan.


Next, you have to rinse the eggplant under cold water.  Keep the water running while you move the colander around; you want to make sure to remove as much of the salt and drippings as you can.   After the eggplant is well rinsed, we will add the eggplant to the onion mixture and mix it well, too, making sure that the eggplant is fully coated with the spices.  Let this cook for about 10 minutes, until the eggplant is soft.


Then, drain the chickpeas and rinse them well under running water.  You don't want any of the canning liquid flavour coming through, so you have to wash them well.  Then, add the chickpeas to the pot.  Also, add the can of tomatoes - juice and all!  Add the entire contents of the can.  Mix all of the contents of the pot together so that the onions, the spices, and the tomatoes are evenly distributed in the pan.


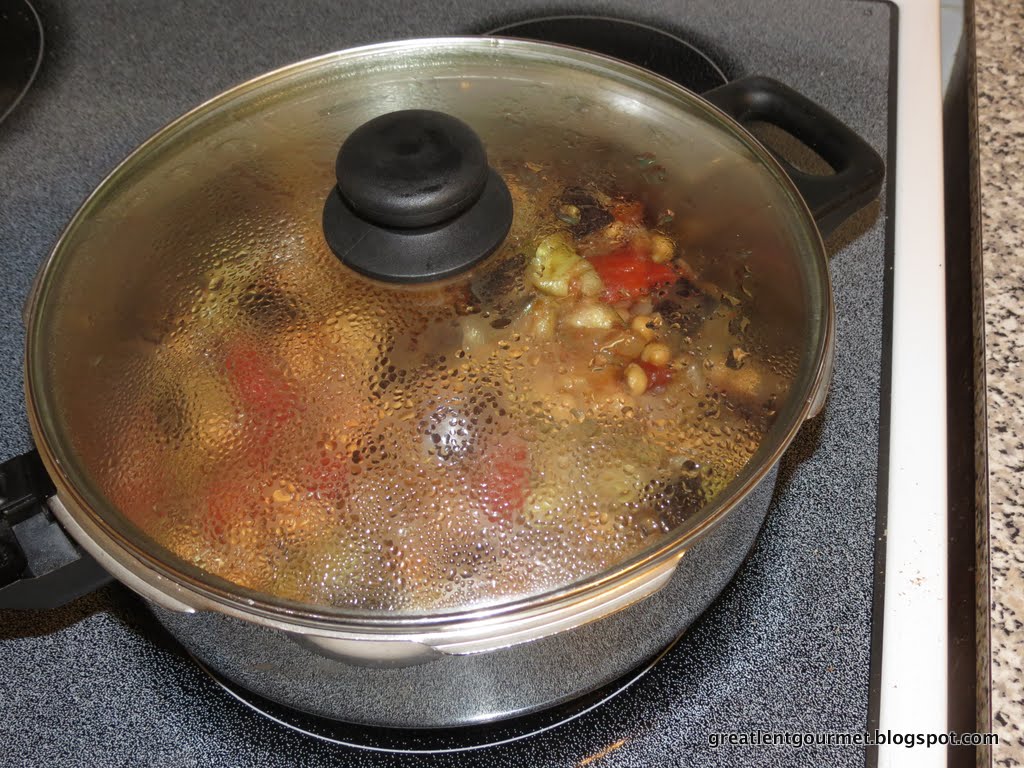

Now, cover the pot and allow this to simmer on a medium-low heat for about 20 to 30 minutes.  Make sure the eggplant is cooked all the way through and that the chickpeas have softened.  You will notice that there may be more liquid in the pot than when you started.  That's fine since the vegetables have released their own juices.  Also, this gives you one more reason to make a nice rice, quinoa, or pasta to soak up all those extra juices.  Serve this warm and enjoy.

We are thrilled to have tried this recipe.  It was a first for us.  Since neither of our families are from northern Greece (all of my ancestors are Greek islanders while my husband's are from Peloponnesos), we were intrigued at the spice combination and that is what enticed us about this dish originally.  Now that we have made this, we  know it is an easy meal to serve through Great Lent and we would use it as a side dish in the summer when eggplants are in season.  It was filling without being too heavy, and it has so many nice flavours coming through.  The cinnamon made the whole house smell good, and the coriander and cumin gave the dish an interesting twist.  Who knows?  We may have to actually try other recipe from this book instead of just reading and looking at the pictures!


"As salt is needed for all kinds of food, so humility is 
needed for all kinds of virtues."

St. Isaac the Syrian


Friday, 29 March 2013

DAY 12: Melomakarona or Finikia - Vegan Greek Honey Walnut Cookies - March 29, 2013


When looking at these cookies, we always have a discussion about their proper name.  For one of us, we learned the term as "melomakarona" (μελομακάρονα).  The other one of us always knew them as finikia (φοινίκια).  What is the proper term?  Well, according to Wikipedia, finikia are similar cookies, but are dry cookies, whereas melomakarona are dipped in a honey syrup and are moist.  That means that today we made melomakarona (μελομακάρονα).  This is a lovely Lenten cookie that takes a bit of time to make, but rewards us with such a flavourful, delightful treat that the time spent is absolutely worth it!

Many of the ladies at church make melomakarona, and are very proud of their cookies.  Often, they are seen around Christmas, but we knew that they were completely vegan and appropriate for Great Lent.  Although there are other recipes that may include butter or eggs, we searched high and low to find the ones that did not have any animal products.  In talking to the ladies at church, we learned that everyone has a secret ingredient when it comes to the flavouring.  Some of the women would not tell us their secret ingredients, which is why it is still a secret, so we had to read through cookbooks to find the right recipe.  We have never before made melomakarona just by ourselves but have been part of the process with different relatives, or with the ladies at church.  Even then, it is usually to just shape or taste the melomakarona.  Today, we took the big step in making melomakarona all by ourselves. And, it was fun!  We think they turned out very well, but we will have to take them to church and get the real opinions about if we did it well (husband, who is very biased, commented that this batch of melomakarona are delicious - "...they have a rich honey, Cinnamon flavour with excellent layers of textures. These really taste very natural and have none of the chemical flavours, particularly that of corn syrup, that I have tasted in many melomakarona in the past!")

As we said, it will take a bit of time to make these cookies.  Even with having the ingredients on hand, it seemed like it took an hour to make the dough and get the cookies to the oven; and then, it took another hour to dunk them in the syrup, top them with nuts, and get them to a serving dish.  So, when you go to make the melomakarona, please allot an adequate amount of time to do it all.


For this recipe, you will need:

1/2 teaspoon baking soda
1 large orange, grated peel and juiced
2/3 cup oil
6 Tablespoons granulated sugar
4 Tablespoons brandy or bourbon
1 1/2 teaspoons cinnamon
3 1/2 cups Self-Rising flour
1 cup walnuts, shelled and chopped

For the syrup, you will need:

1 cup honey
1/2 cup granulated sugar
2/3 cup water


Make the cookies first, and, while they are baking in the oven, make the syrup.  The timing for both is really good and you can multitask this way!


For the cookies, get everything ready before mixing the dough.  Start by grating the skin of the orange.  Make sure not to include the white pith because it is bitter.  We chose the medium grate on our hand-held grater.  And, to make sure that we used every shred of aromatic orange skin, we used a small garlic brush to remove the gratings from the grater.  We had to make sure that none of the bristles fell into the food, though, and that was difficult since the brush is so small.

Once the orange peel is grated, juice that orange and set it aside.  Add the baking soda to the orange juice, and allow it to sit aside.  You will see the coolest chemical reaction, as the orange juice bubbles and foams and triples in quantity when the baking soda is added.


Now, mix the cookie dough by beating together the oil and sugar.  You can use an electric mixer, a hand held mixer, immersion blender, or your hands.  You want to mix the oil and sugar together to make a somewhat thick mixture.  Add the brandy (we used the wonderful Greek brandy Metaxa), 1/2 of the cinnamon, and then, the orange juice mixture.


Make sure all these ingredients are well combined before adding the flour.  Mix by hand to add the flour.  (We used a spatula to fold in the flour so we could feel if it was getting too much flour or not enough.  We know of some women who stick their hands directly in the bowl to mix the flour.)

Just add the flour and mix it in to the liquid ingredients.  With self rising flour, you may notice that the dough is a little lighter.  It is self-rising because it is flour with an already added leavening agent -- usually baking powder.  Since the two ingredients are evenly distributed, the self-rising flour does its job of leavening a product without you having to worry.  Add the self-rising flour and mix well.


Once the dough pulls together, add the grated orange rind and knead the dough for about 5 minutes.  This will assure that the rind is evenly mixed in to the dough.    Knead the dough for three minutes, and then, you can start shaping the cookies.


In order to make uniformly sized cookies, there are several ways to approach this.  You could pinch the desired amount of dough, and set it aside.  You could use  a scoop or spoon and get the cookies to be the same size.  You could roll a log and slice even slices to have uniform cookies.  We chose to use a Tablespoon measure to make our melomakarona.  They came out a nice size -- not too big, about 2 bites per cookie.  Once you have the lumps of cookie dough, shape the dough into oblong balls, by rolling it around in  your hands.  Once you get an oblong ball, lay it on a cookie sheet to bake.


Once you have all the cookies rolled into the oblong shape, use a dinner fork (or dessert fork, or some fork) to press the grooves into the top of the cookies.  Dip the fork in warm water, then press on top of each cookie, being careful to keep the fork flat on the cookie, not digging in the tips of the fork's tines.


Then, bake the cookies for 20-25 mintues at 350° F (175° C)  until the cookies are solid, golden brown, and slide off the paper without sticking (that's also how you know the bottom is baked.)

Once you get the cookies in the oven, make the syrup.  You need hot syrup with cold cookies.  This will not work with hot cookies and cold syrup!  The syrup must be hot!


Make the syrup by combining the honey, the sugar, and the water in a saucepan, and heating it.  Bring the mixture to a boil, stirring continuously.  Skim off any foam that arises from the surface.  Then, lower the heat to a medium-low until the syrup thickens.  You don't want it too thick because you will have to dip your cookies in it.  The hot syrup should end up being the thickness of warm honey.  Keep the syrup on medium low heat until you are ready to dip the cookies.


When the cookies are baked, using a spatula immediately transfer the hot cookies to a cooling rack.  This will allow air to circulate under the cookies as well as on top of the cookies.  Let the cookies cool completely before moving on to the next step!


Now, get your next step set up and your work area ready.  Line up the cookies near the syrup, so you don't make a mess all over the kitchen.  We put our cooling rack on top of a cookie sheet lined with parchment paper, to catch any drips from the cookies.  You will also want a slotted spoon or two to move the cookies form the pot to the cooling rack.  Remember, the syrup is hot, so it will be more difficult to use your fingers!

We also got our walnuts ready by crushing them.  You can crush the nuts with your fingers if you want really big chunks of nuts, or you can put them in a zipper-seal bag and use your rolling pin to crush the nuts.  We like the variety of coarseness that we get from the zipper-seal bag method.  We have larger chunks and smaller granules which really adds an attractive element to the cookies.  Once you have the nuts ready and the dipping station set, then you can move to the next step.  Having these things in place before you start will make this process smooth and efficient.


Now, one at a time, put the cookies into the pot of syrup.  We found that when we put the cookies in the right way, we had to spoon the syrup over the top of the cookie, and then flip the cookie in the pot; but it ended up that the bottom of the cookie was saturated, and the top was rather dry.  So, we learned that we need to put the cookies in the pot of syrup face down -- so the top of each cookie is submerged in the syrup, and the bottom of the cookie faces up.  Leave the cookies in the syrup to cook for 2-3 minutes.  It sounds like a long time, but the cookies are so airy and light, they need the time to absorb the syrup fullly and become slightly saturated on the inside.


Using a spoon, slotted or otherwise, transfer the soaked cookies to the cooling rack, and allow them to sit for a moment -- until they are cool enough to touch  but still very sticky.  First, sprinkle the melomakarona with cinnamon, then move the cookies to the plate with the walnuts.  Roll the top of the cookie in the nuts to make sure to coat the entire top of the cookie.  Then, return the cookies back to the cooling rack to allow them to drip dry.

If you added all the cinnamon in the dough, sprinkle some more cinnamon on top of the cookies.  You can be a bit generous.  Several of the ladies at church mix together a cinnamon-sugar combination to sprinkle on the cookies after they add the walnuts.  Let the cookies sit until they are completely cool and not sticky.  Serve the cookies at room temperature.  These will keep in the fridge for a couple of weeks, or they stay at room temperature in an air-tight container for up to 7 days.  In our house, these don't last that long because they are such a yummy Lenten treat!


"Conquer evil men by your gentle kindness, and make zealous men wonder at your goodness. Put the lover of legality to shame by your compassion. With the afflicted, be afflicted in mind."

St. Isaac the Syrian