
March 25th is one of the days that we can eat fish during Great Lent. We did! We enjoyed some traditional fish.
Today, however, is Palm Sunday; this is the other day during Great Lent when eating fish is permitted. For today's recipe, we made fried whiting (Μπακαλαράκια). We followed the simple flour and fry method that our parents and grandparents have used for years, and it is the method that is difficult to do wrong, and it is usually quite tasty.
Whiting is a name that refers to a variety of white fish. It is a small (6-8 inches length, 1-3 inch diameter) fish with one, connected, central bone that is easily removed when the fish are cooked. Some Greeks refer to these whitings as Bakalarioakia (small cod fish), which is not exactly a correct name, but it makes us think about the dry, salted fish that we enjoy.
You can addd seasonings that you like to this recipe as there is nothing written in stone for this recipe. However, we will give you some of the pointers that might make your selection of fish and seasonings even tastier than it was before this entry.
We start by purchasing the fish. When you buy fish at the store, make sure that the eyes look clear and whole. If they are cloudy eyes or sunken into the head, the fish is older and will have a stronger smell and taste. You can have the fish cleaned like we did, which removed the stomach and guts, and should scrape off the scales. We took the next step of cutting off the heads and removing the black film inside the top of the fish body. When we have left the black film in place, we found that it gave the fish a very bitter and unappealing flavour. The easiest way to pull that film off is with your fingers, grab one end and pull -- it comes off like a piece of tape!
Rinse the fish well after removing the black film to make sure that there is no residue inside or outside the fish.


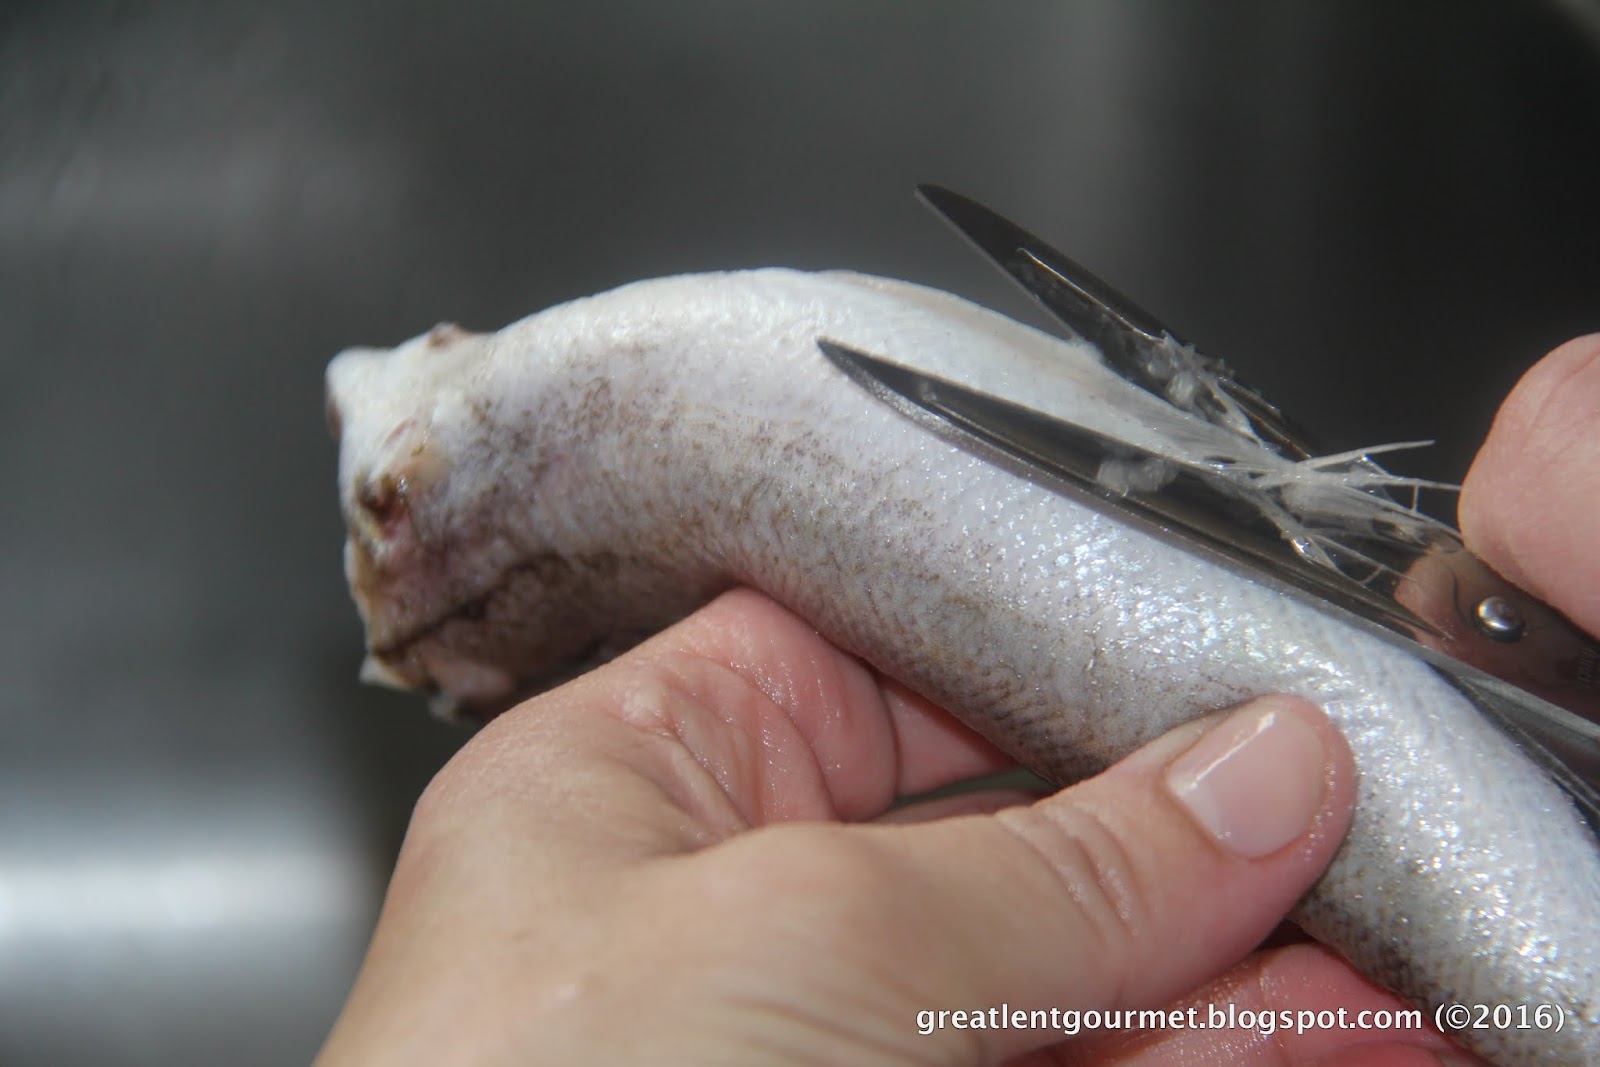
We then removed the fins on the top and bottom of the fish. They are small and hard and come off very easily with scissors. We cut these off because of our personal preference of not having to eat around them. The fish is nice and clean and seems to have more meat when these are removed. Since the side fins had been removed at the initial cleaning at the store, we took a few minutes to remove the dorsal fin (on top) and the pelvic fin (under the body). Scissors made this really easy to do, but you can use a knife if you are more comfortable with that. And, if you leave them on, that is fine, they are like getting cartilage in your mouth when eating.

Rinse the fish again to make sure that there are no residual pieces of anything on the fish. And, as they sit in the colander dripping, get your flour ready.
We used a self rising flour to dredge the fish. Of course, all purpose flour works quite well, but we find with self rising flour, the fish will have a lighter, more crispy coating. It is a similar comparison of tempura, which is light and crispy, to traditional deep fried, which is a heavier, thicker coating.
We used about 2 cups of self rising flour for 24 fish. This was more than we really needed by about 1/2 cup. So, you can use 1 1/2 cups flour for 24 fish.
We put seasonings in the flour because this is what will stick to the fish. We used about 1 TBSP of each: Montreal Steak Spice (there is no steak in the spice), Oregano, Salt, and Garlic Powder. If you have garlic salt, then omit the salt and just use the garlic salt.
Some people will salt the fish before dipping it in flour. We find that was more difficult to judge the amount of salt when we did that. For us, we can control our salt intake if we know exactly how much we are putting in the mix. And, if you like other specific flavours with your fish, then add some to the flour. For us, and for feeding a crowd, we stayed a little traditional. Our addition of Montreal Steak Spice is the non-traditional factor here, but we put that in most of our dishes. It has pepper, paprika, garlic, onion, coriander, salt, and dill mixed together. We like the combination and finds it adds a little oomph to many dishes. One Koumbaro grinds the steak spice to a powder and adds it. We left ours in the larger crystals.
Add the seasonings to the flour and mix it well so that you cannot identify one form another.


Now it is time to dredge the fish in the flour. You do not want to dry your fish before putting it in flour. You have to have a bit of moisture for the flour to stick well to the fish. Toss each fish around in the flour to fully coat the inside and outside.
One person suggested putting the flour in a large zipper seal bag, dropping the fish in the bag and shaking to coat the fish with flour. That is a clean and practical method, but harder to show in pictures, so we, again, stayed traditional with a bowl. As long as the fish is fully coated inside and out, use the method that suits you.
Allow the coated fish to sit aside while the oil heats.


Heat about 1 inch of oil in a frying pan. You want to make sure that the pan is big enough in diameter to fit the entire fish without having to bend or cut the body. You will know when the oil is ready when you sprinkle a little flour in the hot oil and you see it dissolve and you hear the sizzling noise of frying. Then, it is safe to start to add the fish.
Using your hands or tongs, lay the fish into the hot oil. Don't drop it in the oil because the oil is hot and if it splashes, you could get hurt. We don't want that for anyone. One by one, lay the fish in the pan without touching any of the bodies together. Allow enough space in between each fish for the hot oil to get to both sides of each fish.


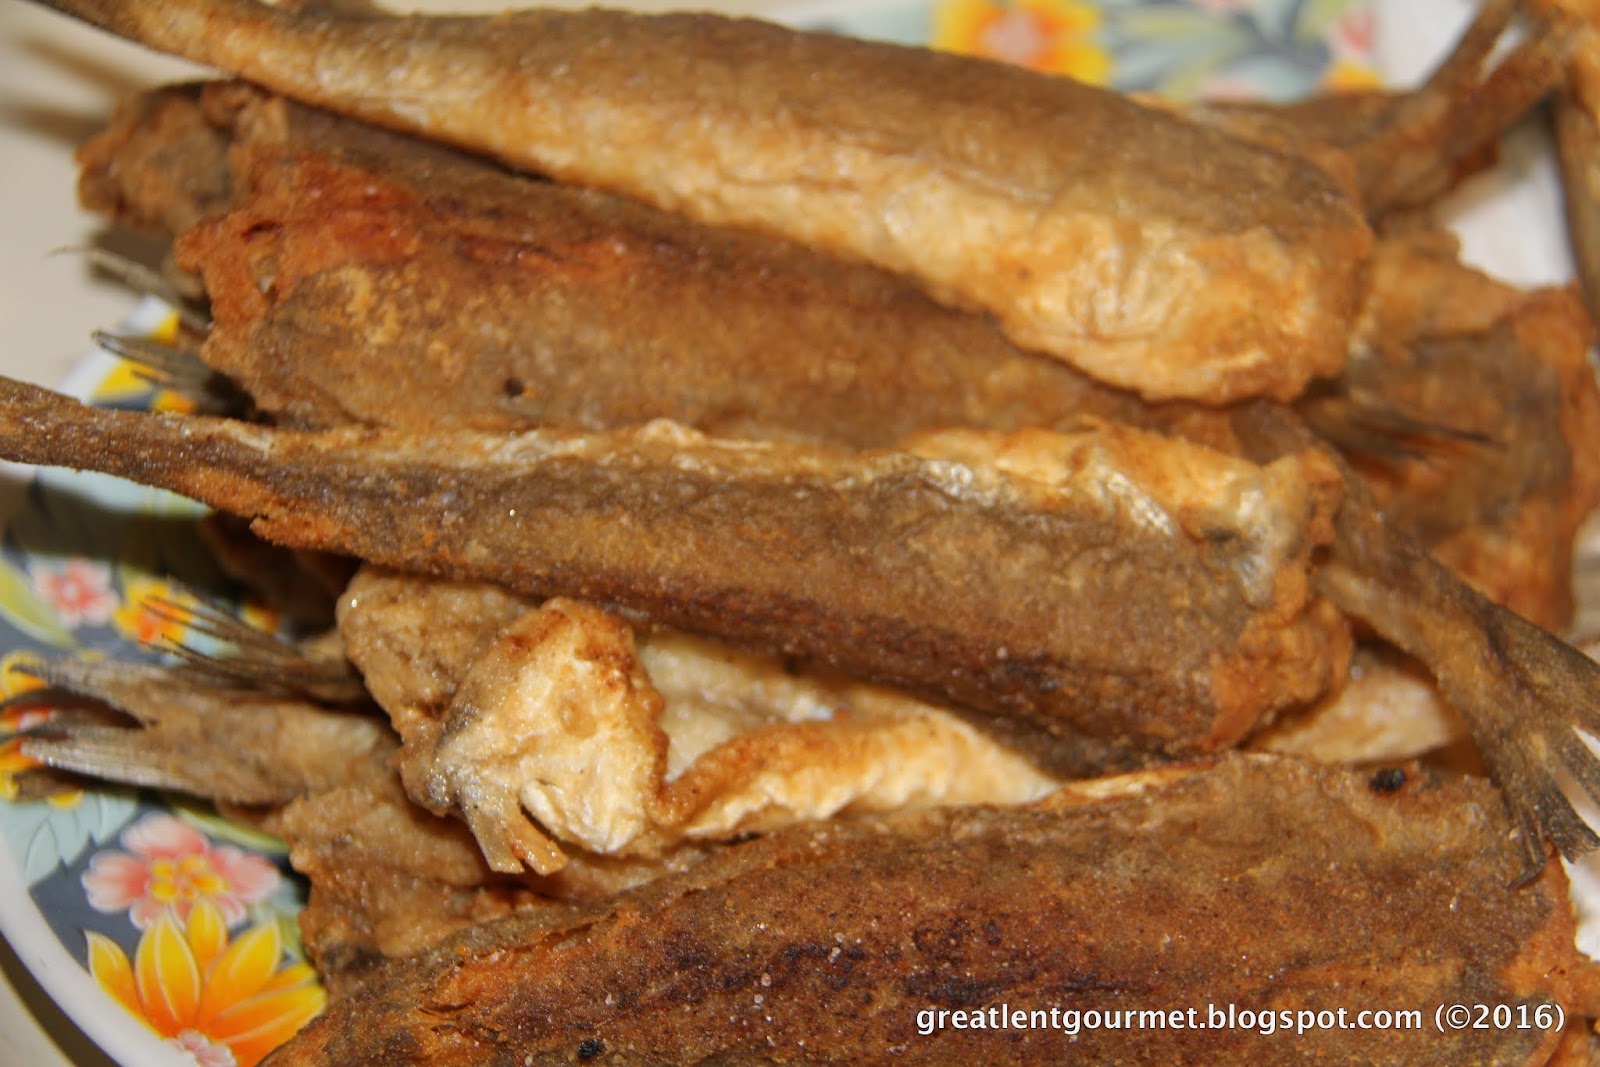
When you see the edges turning golden brown -- that nice fried colour, then it is time to turn the fish. To get to that golden colour, this will take about 4 minutes. You can see in thenext picture the golden sides and the white top of the fish. Once you turn the fish over to the second side, you can admire the even colouring.
Fry the fish on the second side for about 3 minutes, until the second side is equally brown. These are small fish and do not take too long. Six to seven minutes to fry fully will give you a crispy outside with a flaky, soft inside. If you prefer a chewier fish inside, then allow the fish to cook for another two to three minutes. You will see the colour outside get darker, too.


Once the fish is fried, remove them from the oil and lay them on paper towels to drain off any excess oil. Again, try to keep a space between the fish to allow all the oil to fall to the paper towels instead of onto each other.
We, then, ground some finishing salt on top of the fillets. You want to do this while the fish is hot so the salt will adhere to (stick to) the coating. This step is optional, but does add that little saltiness that is expected with a fried fish.
Continue these steps until all the fish is fried.


When all the fish is fried, it is time to eat. Serve these hot with lemon wedges and skordalia. Don't forget that there is one bone in the middle of the fish that should come out very easily. And, with that bone being attached to the tail, it provides a natural skewer so you can enjoy the fish like a kebab. To keep the fully fried fish warm while you continue to cook the entire batch, turn the oven on at 200º F (about 93º C) and put the fish in there on an oven-safe dish or a pan. Leave the paper towels in place while keeping the fish warm so they can absorb any more oil from the fish. Serve with your choice of side dishes and enjoy.
No comments:
Post a Comment